Workbench · 7 min read · Updated 2026-09-08
Open local files, edit code, and review changes in TabTin
Local directory lets you browse computer files, preview materials, and edit text in TabTin.
Feature overview
Local directory lets you browse computer files, preview materials, and edit text in TabTin. Code Workbench adds code search, editing, and Git change review for scripts, small tools, and project code.
This guide uses a fictional shopping calculator: change the payable rate from 95% to 90%, then check saving and the diff. It illustrates features only and involves no real orders.
How to use it
First open the workbench
Open TabTin and go to the left-side Task page and click New task. In “Shortcuts” at the bottom right of New task, click Workbench to open the application entry list.
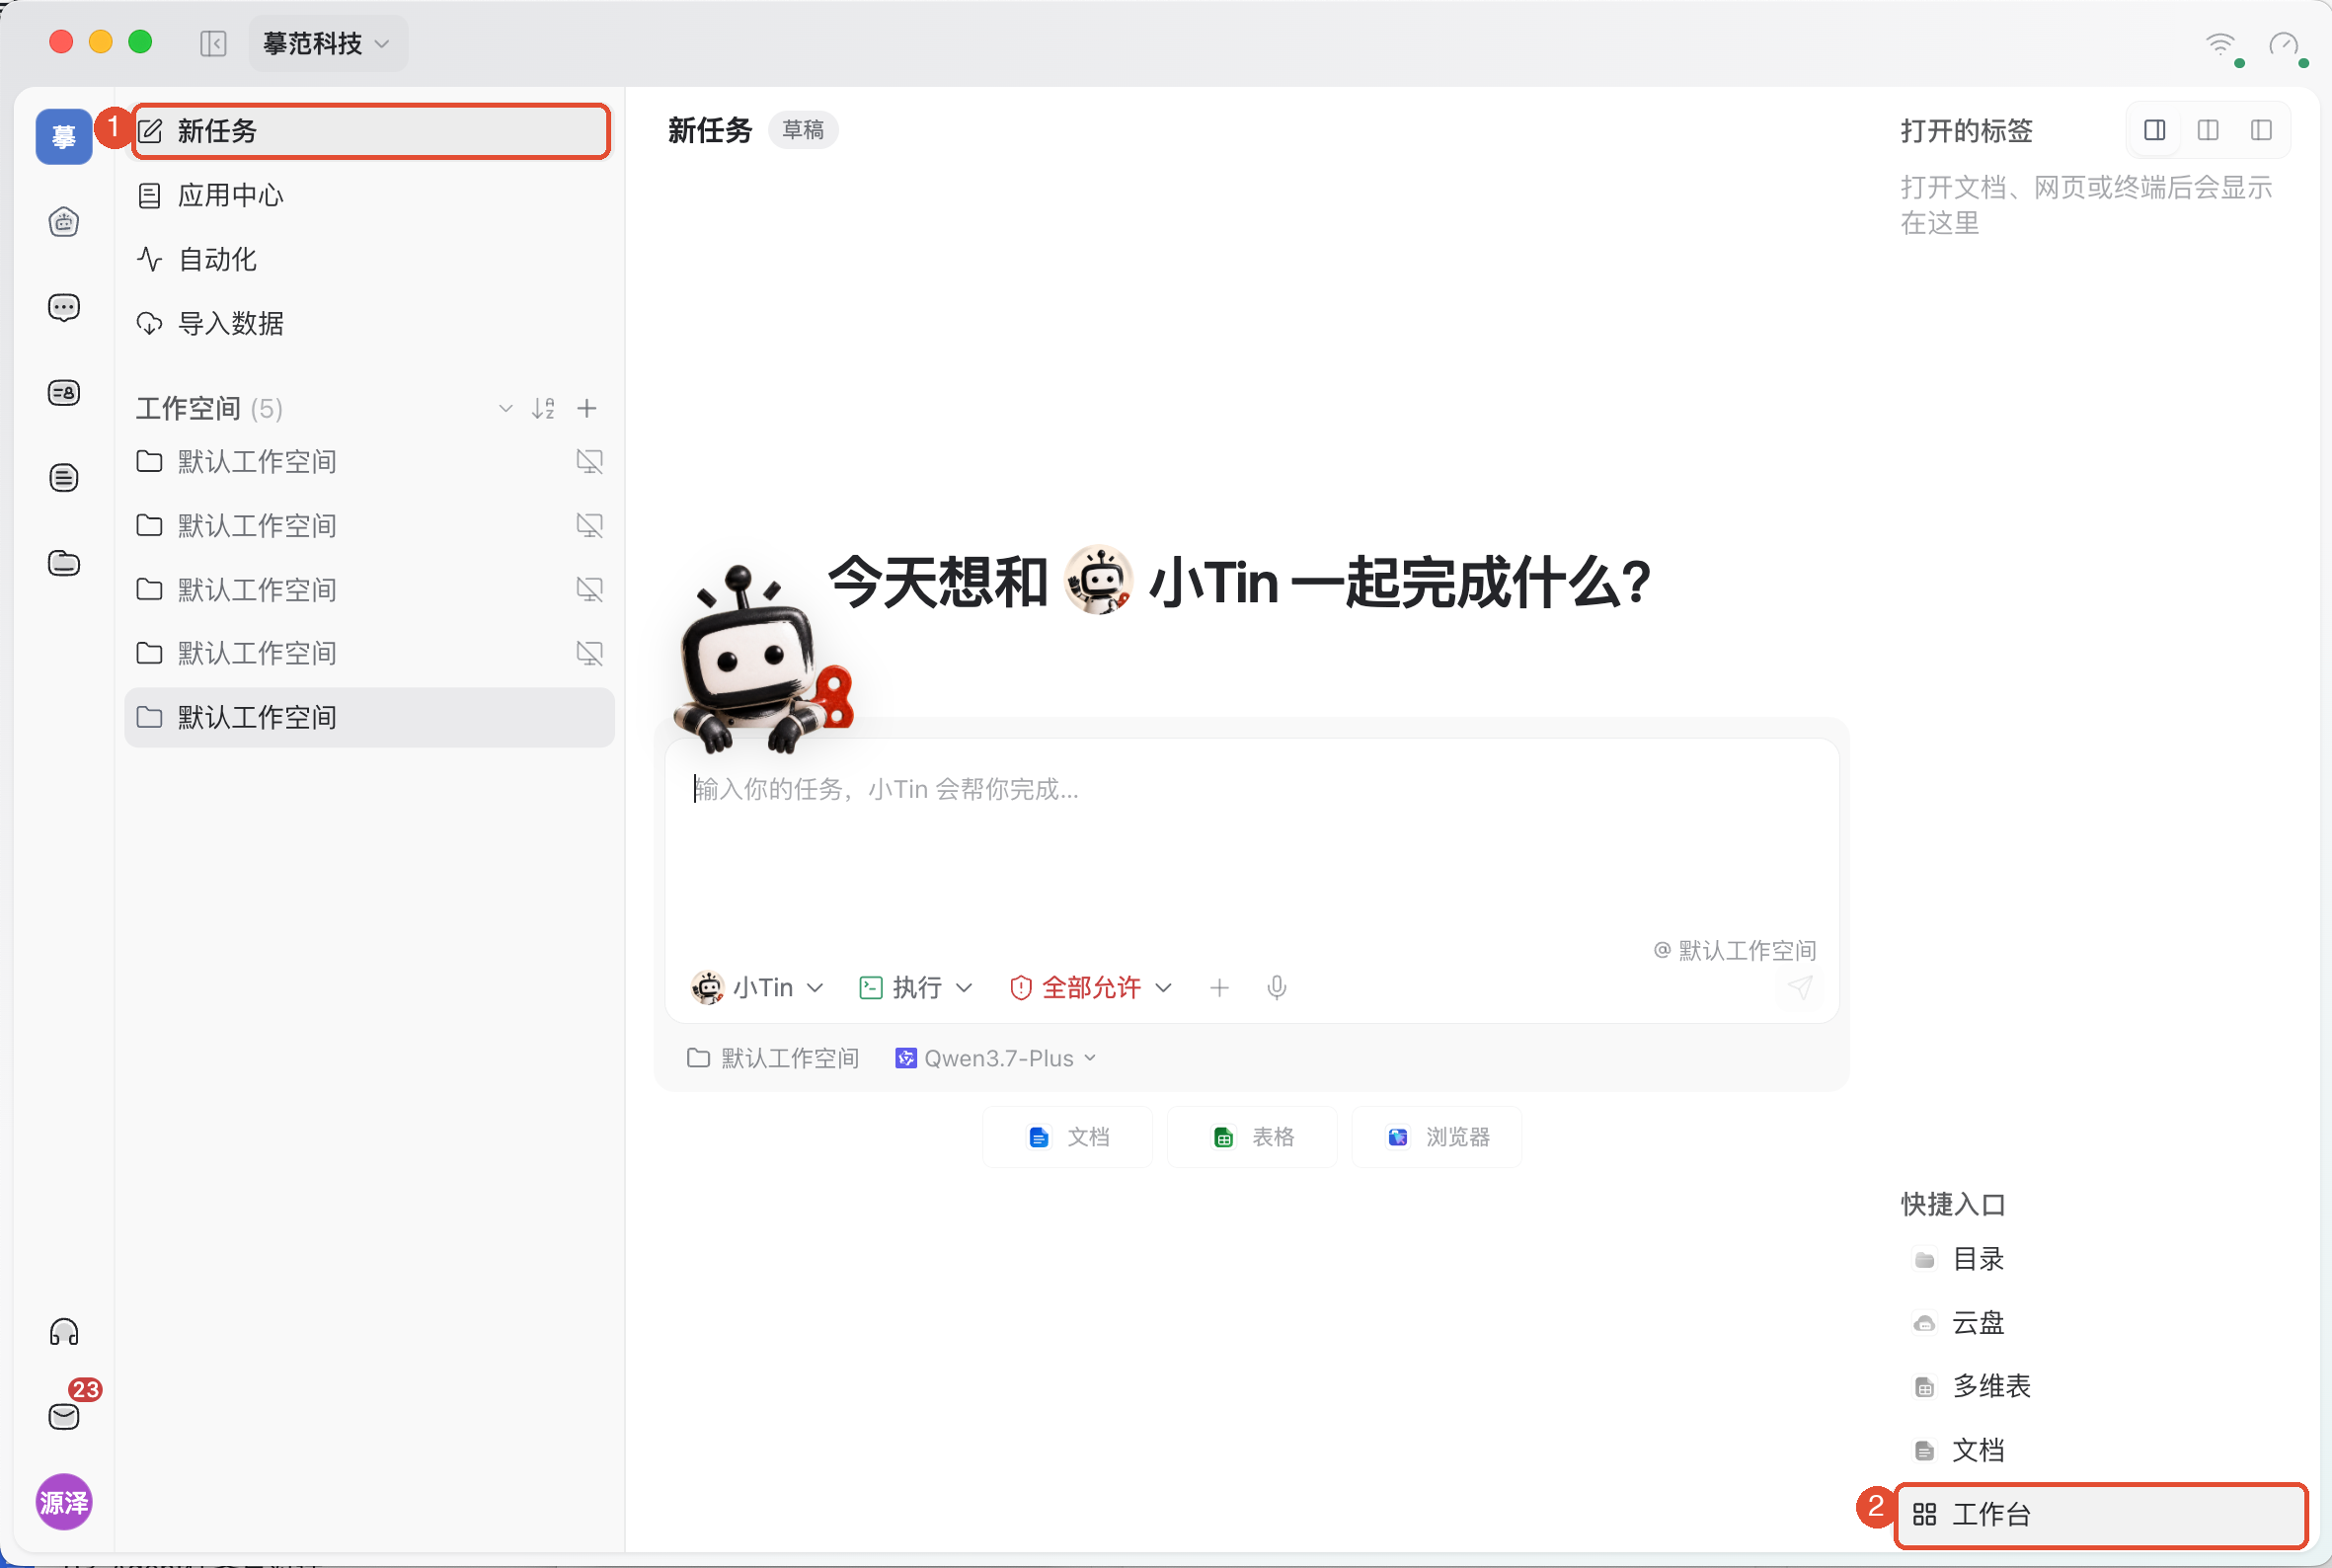
Once there, open the application using the steps below. If the top Workbench tab is already visible, click it to return to the application list.
1. Add the folder to work on
- Open the task’s Workbench and, under All apps, open Local directory.
- Click Add directory, then select the target folder in the system picker and open it.
- Click a file in the left tree to view its content or preview on the right.
Use the file browser for ordinary materials. For code, switch to Code Workbench. When a Git repository is detected, branch and change actions also appear. To return to ordinary browsing, open Code Workbench’s More → Switch to file browser.
Adding a directory creates a local browsing entry only. It neither uploads files to cloud storage nor automatically changes the terminal’s or AI’s working directory.
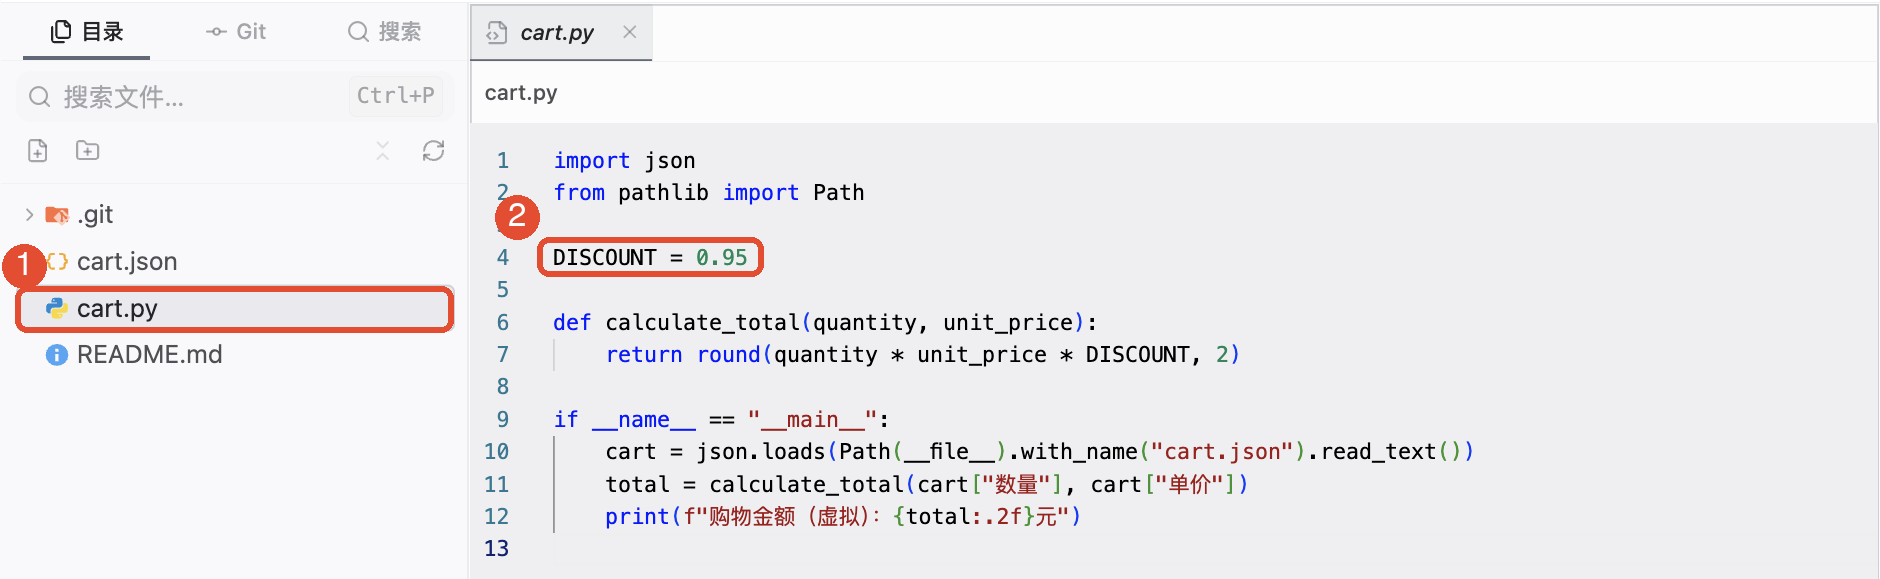
2. Find the file and edit location
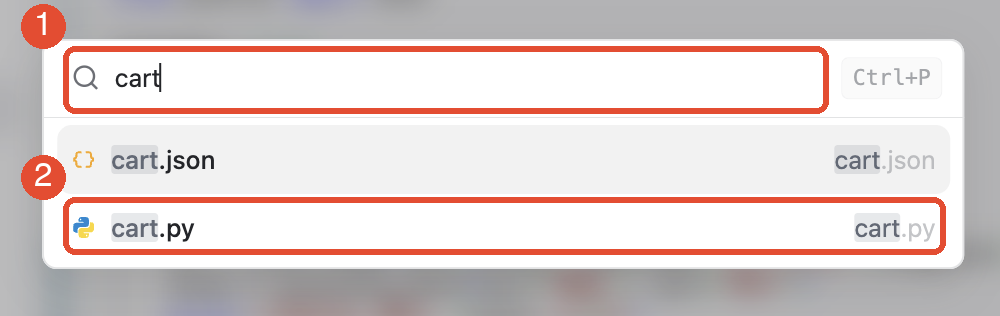
Know the filename: Above the file tree, click Search files, enter part of the name, such as “cart,” and select cart.py.
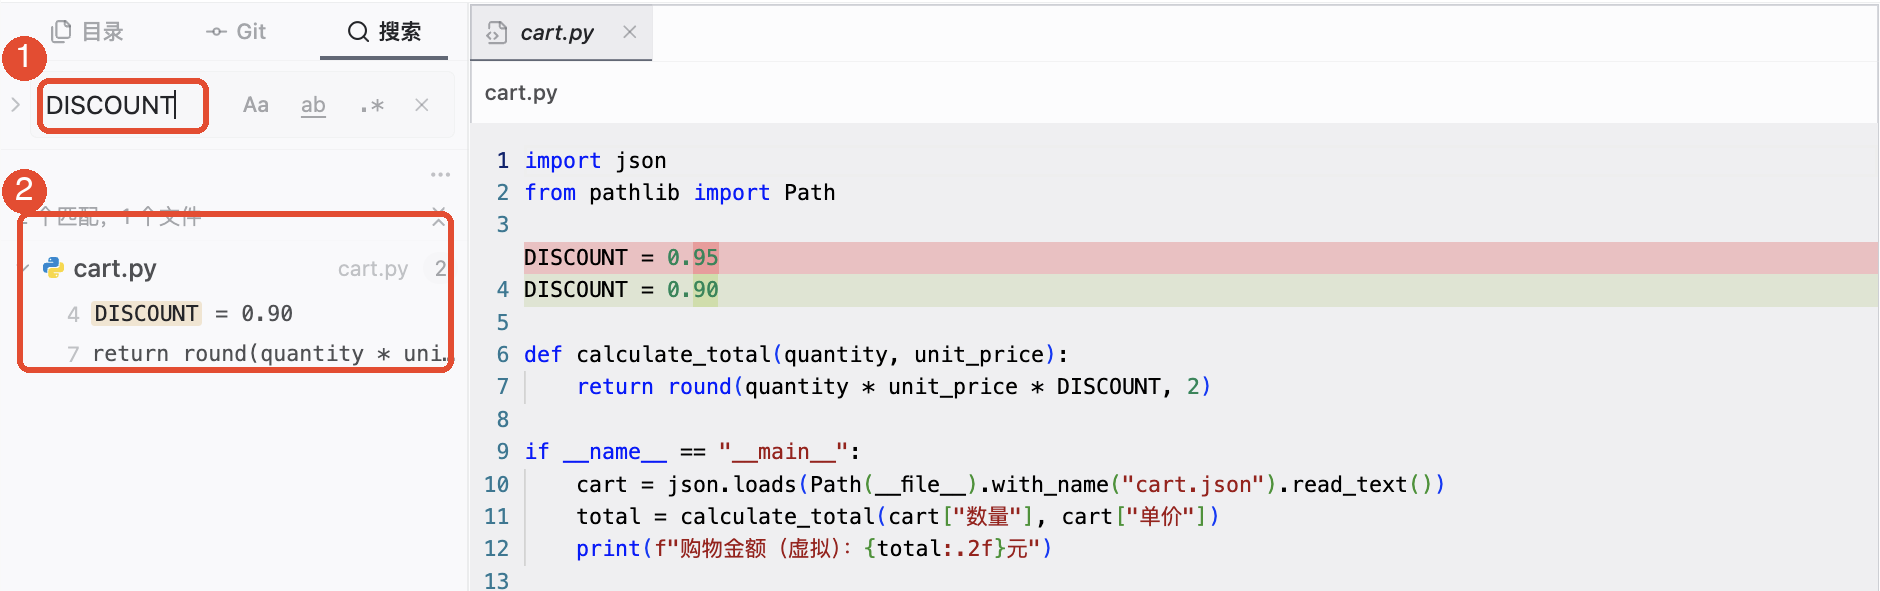
Know text inside the file: Switch the left panel to Search and enter a keyword, such as “DISCOUNT.” Results are grouped by file with line numbers; click one to jump there.
Filename search finds files; content search finds text inside them. If nothing appears, check the directory, search scope, and options such as case sensitivity, whole word, or regular expressions.
3. Edit and save
Open editable text or code and change the target content. For the calculator’s rate, the original line is:
DISCOUNT = 0.95
Change it to:
DISCOUNT = 0.90
0.95 charges 95% of the original price, a 5% discount; 0.90 charges 90%, a 10% discount. For an original CNY 200 price, the results are CNY 190 and CNY 180.
After editing, click Save and inspect the file again to confirm the value was written. To verify program output, run it in the terminal as the project instructs. Saving code does not run the calculator automatically.
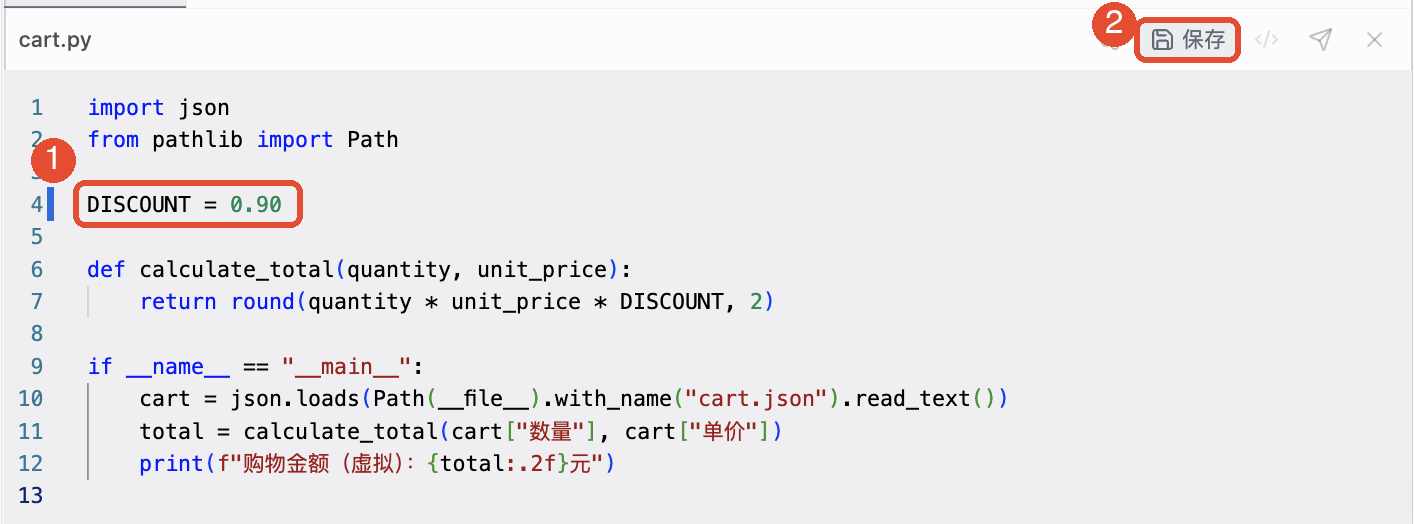
A single click usually previews a file temporarily; double-click to keep its tab open for comparison. For Markdown, switch between Source and Preview: Source is for editing; Preview is for checking the display.
4. Check what you changed
Git records versions of files.For code projects using Git, compare current files with recorded versions.
If the directory is a Git repository, open a file and click Show changes to compare before and after. You can also use the bottom Changes to review changed files together.
In the discount example, 0.95 should become 0.90. Verify that only intended files and content changed before deciding whether to commit. Without a Git baseline in an ordinary directory, reopen the file to check saving.
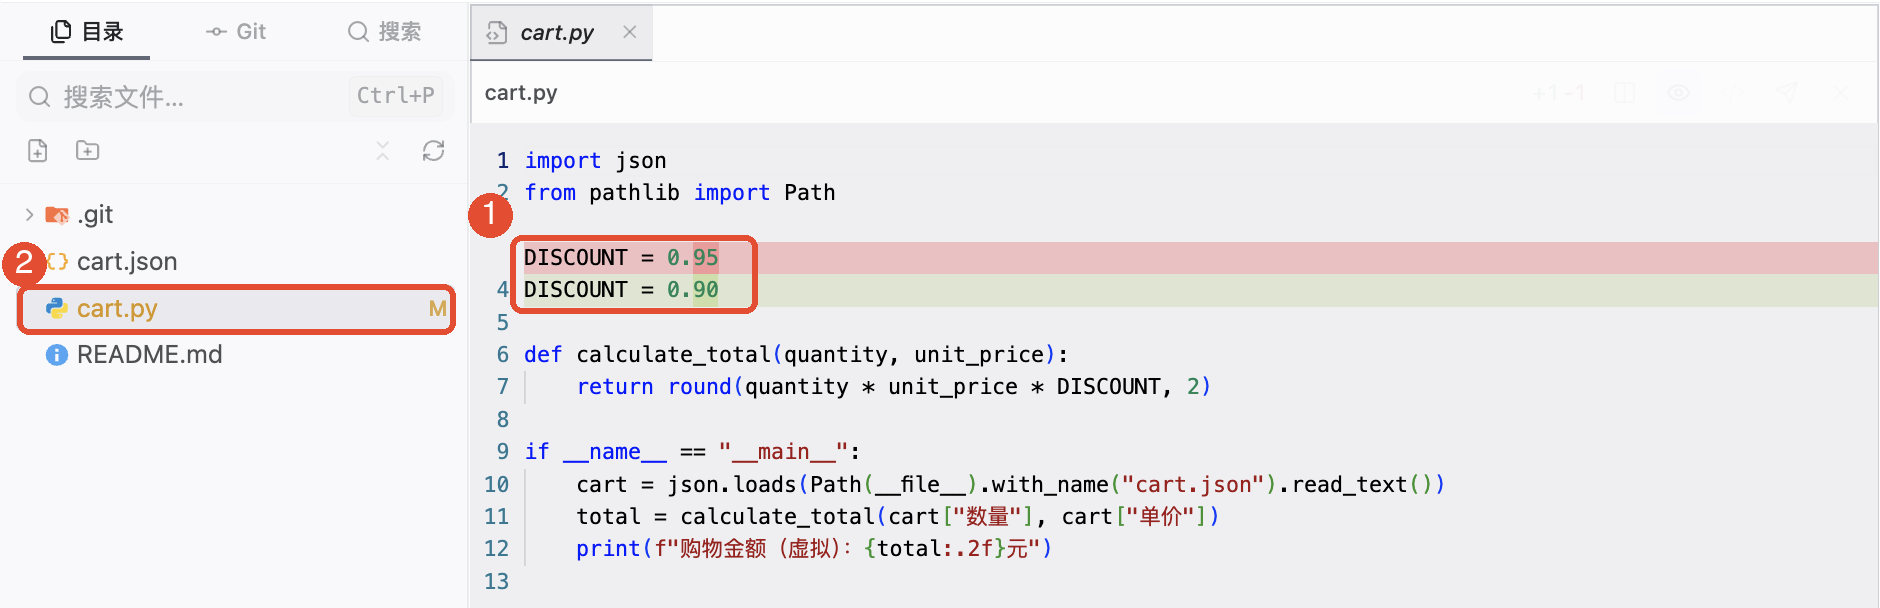
Saving writes changes to computer files; committing records selected changes as a version. They are separate steps.
5. Send a file or code snippet to AI
- To discuss the whole file, use the code preview’s Send to Agent action.
- To discuss a few lines, select them and click the floating toolbar’s Add to conversation, or use the file toolbar’s Reference selection in conversation.
- Check the referenced path and scope in the conversation, write a clear request, and send.
For example: “Explain how this shopping calculator computes the discounted amount. Change the payable rate from 95% to 90%, modifying only that parameter, and explain the result for an original CNY 200 price.” Then check the file changes and verify results according to project instructions.
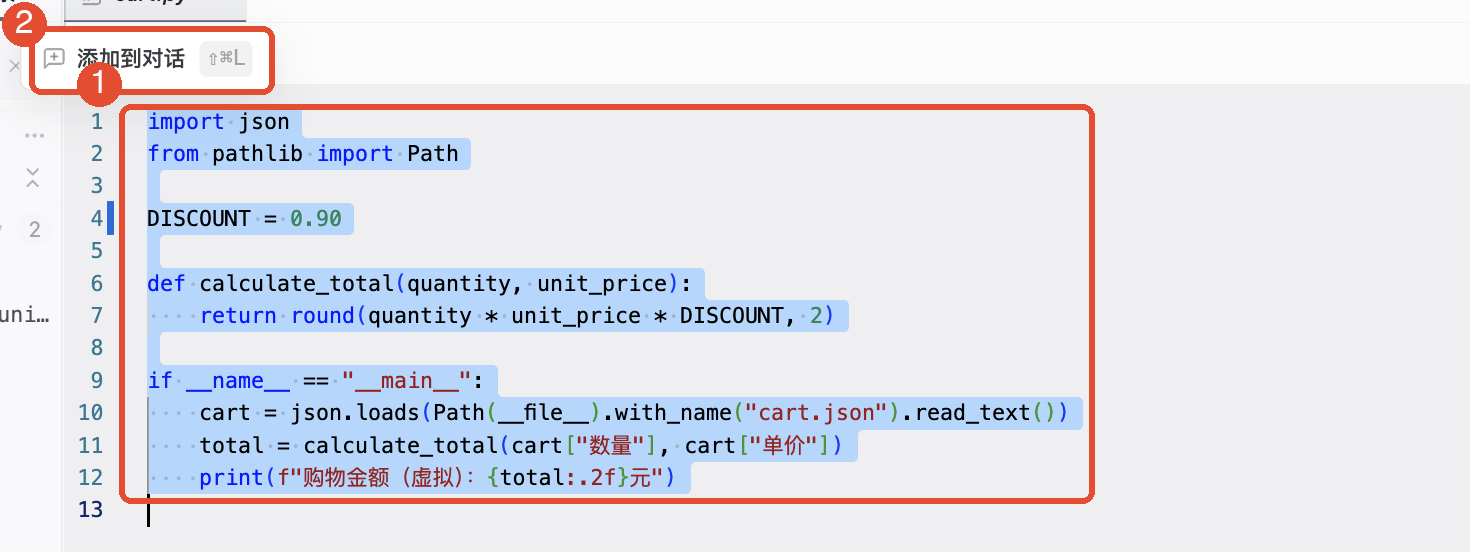
Whole-file and selection references cover different scopes. Referencing a snippet does not mean the entire directory was read, and adding a reference does not send the task.
Other common features
Create, rename, and organize files
The directory toolbar provides New file, New folder, Refresh, Copy path, and Open in file manager and other actions. Check the current directory before creating anything; refresh after external applications change files.
Right-click files for Open with default app, Reveal, Copy path, Rename, Delete, and other actions. Renaming or moving may require updating code, links, and commands using old paths. Deletion affects local files; they do not enter the cloud drive recycle bin.
Commit, review history, and sync code
In a Git repository, the usual order is Edit and save → Review diff → Stage → Enter a message and commit. Staging selects changes for this commit; unstaging keeps the changes in your files.
History lets you inspect historical versions. Use Fetch, Pull, or Push to sync remote code as appropriate. Pushing requires a configured remote and access. Local commits do not automatically send code to the remote.
Separate tasks with branches and worktrees
Branches let you handle different changes separately.Worktree lets you edit different branches simultaneously in separate directories, reducing interference between tasks.
Confirm the branch and directory before creating or switching, and the source and destination before merging. If conflicts occur, resolve them individually and verify results before continuing the merge.
Adjust search and preview modes
Narrow content search by case sensitivity, whole words, regular expressions, and file scope. Semantic search also depends on indexing and service status. If results are incomplete, locate files by filename or keyword first.
Text, code, images, and other files use different previews. For oversized or unsupported files, follow the prompt to open externally or narrow the reading scope.
Things to keep in mind
- Seeing a directory in the tree does not mean AI has execution or write permission there. Check the workspace and authorized paths before asking AI to act.
- Save, Commit, and Push are separate steps affecting local files, Git versions, and the remote repository respectively.
- If another application changes a file, reread or compare it before continuing to avoid overwriting new content from others.
- Before deleting, overwriting, or moving files, confirm target paths and affected scope.
FAQ
Why are there no Git actions?
Confirm that you opened Code Workbench and the directory is a valid Git repository. Ordinary directories still support browsing and editing; no repository is needed just to view materials.
Why is M still shown after saving?
M means the file differs from the Git baseline, not that it is unsaved. Check the disk contents, then decide whether to commit.
What if I can find a file but AI cannot access it?
Check the workspace, actual file path, and conversation authorization scope, and follow permission prompts.
What if changes do not appear in the preview?
Confirm saving and that the preview is the same file, then refresh or reopen. Also check whether another application changed it.