Organizations & collaboration · 5 min read · Updated 2026-09-08
Find colleagues, create groups, and share materials: communicate in TabTin
IM means instant messaging. Use it in TabTin to contact colleagues, create groups, discuss work, and share materials.
Feature overview
IM means instant messaging. Use it in TabTin to contact colleagues, create groups, discuss work, and share materials—for example, arrange a weekly meeting, send meeting materials, or find an earlier discussion.
This guide explains common messaging actions through weekly meeting notices, finding colleagues, and creating a product group.
How to use it
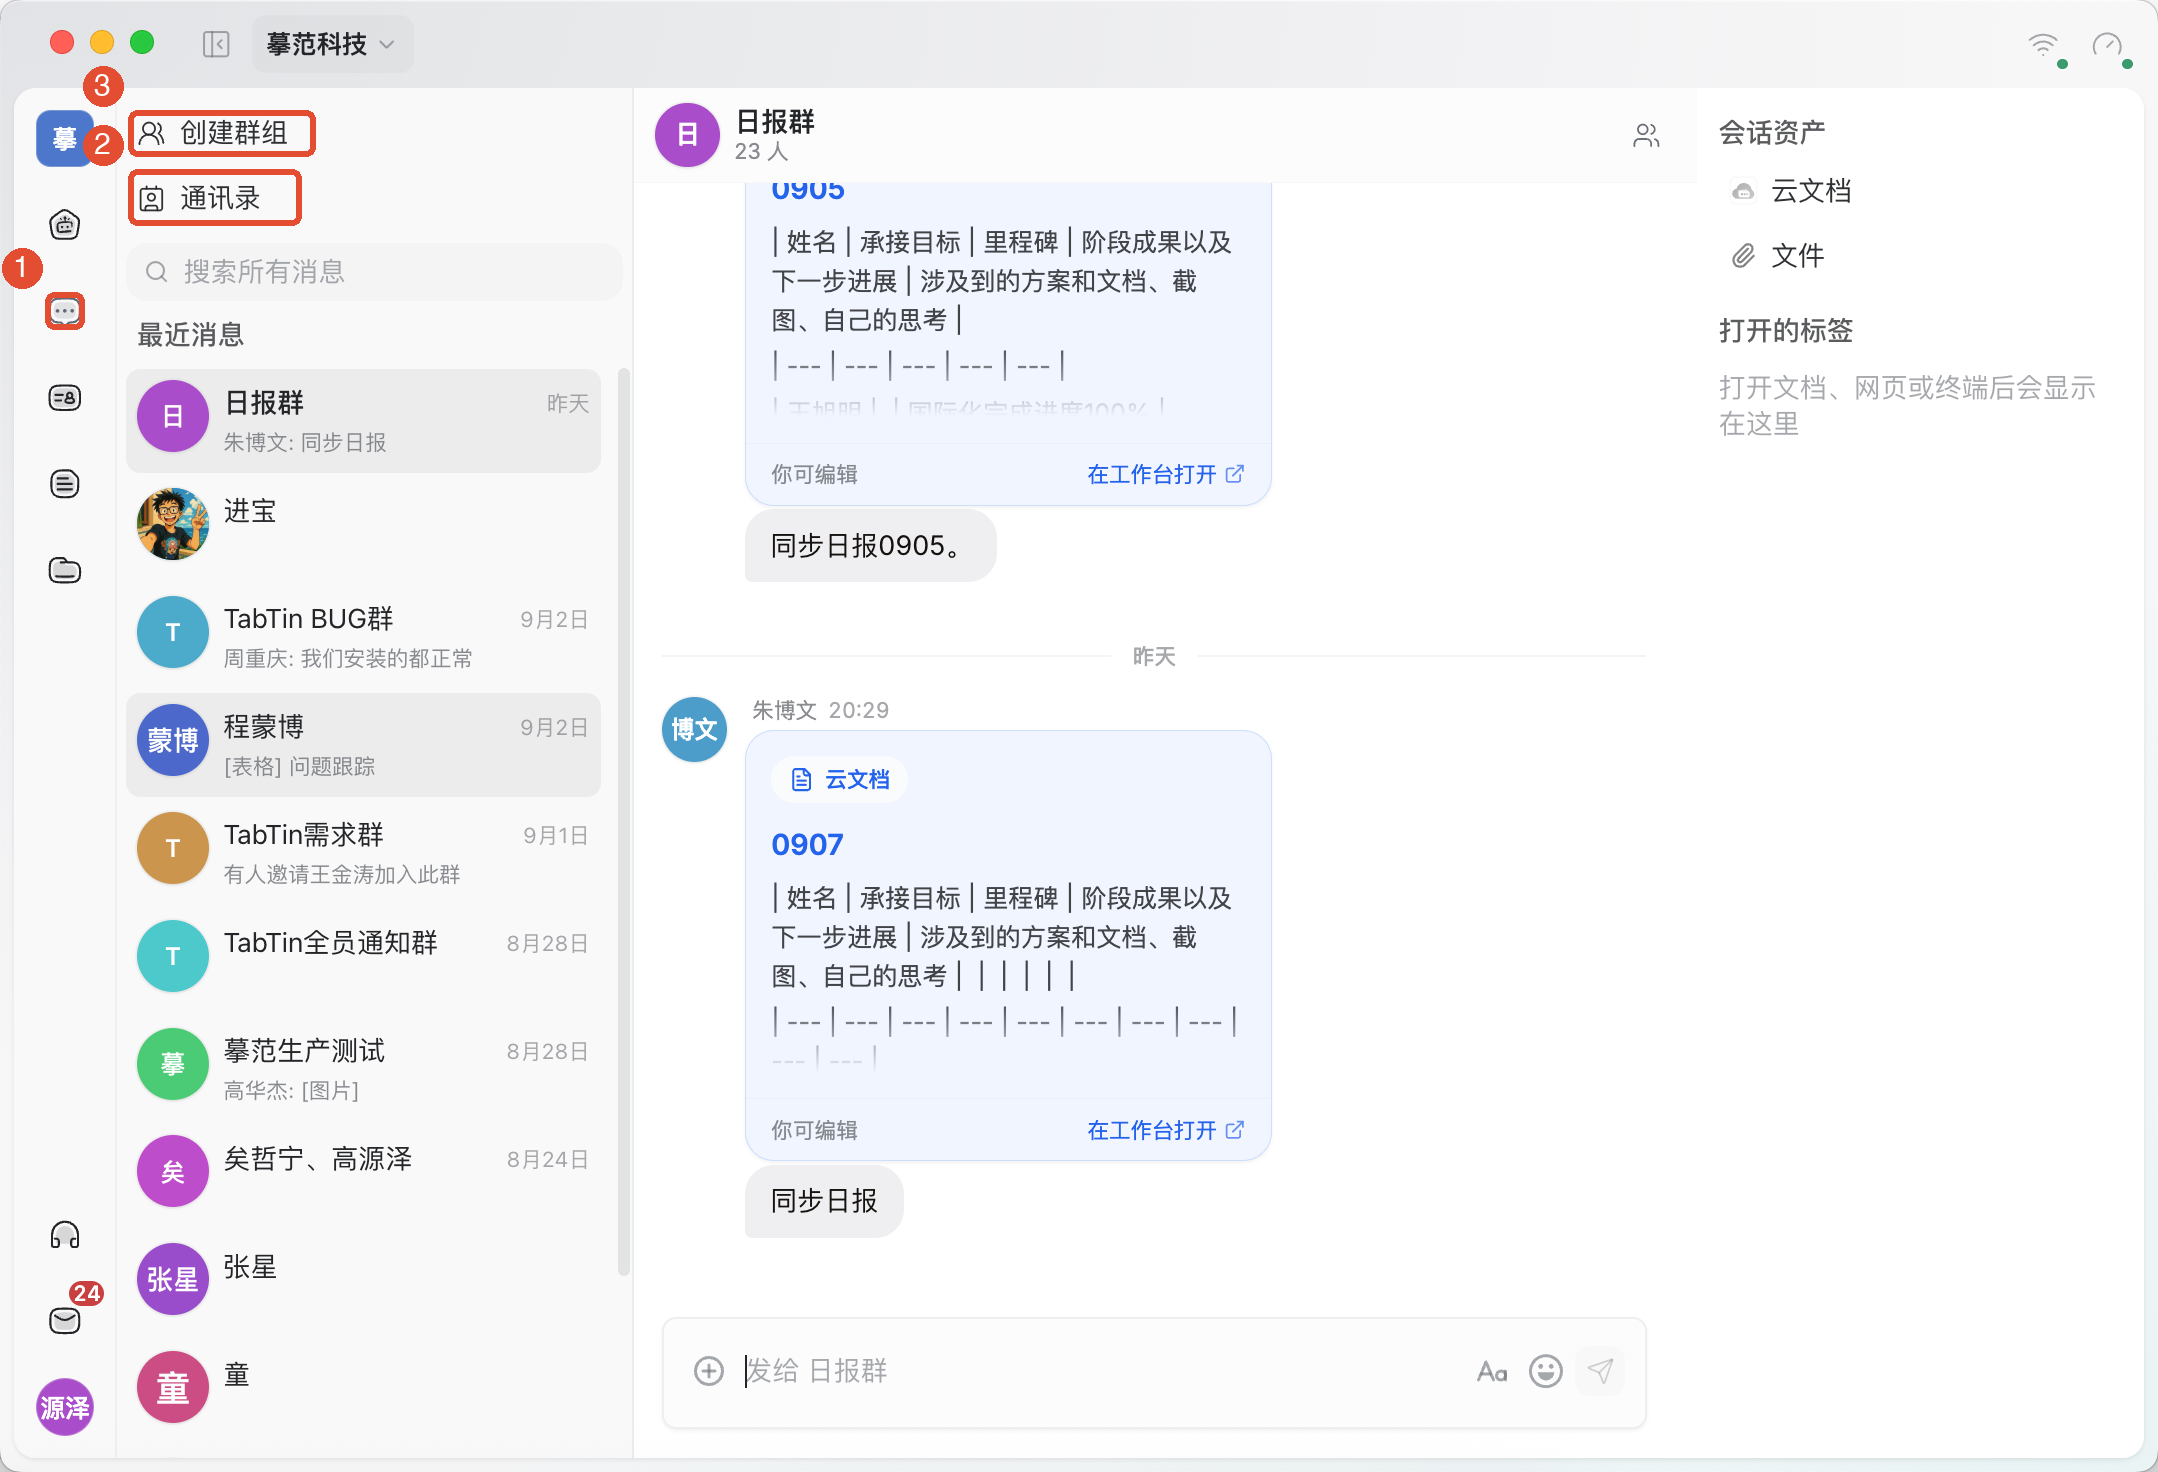
1. Open Messages
Confirm the current organization, then in the main navigation on the left click the Messages icon. The sidebar shows recent conversations, with Address book, Create group and message search at the top.
2. Find a colleague and open a direct conversation
- Click Address book on Organization members to find colleagues.
- Enter their name in the filter, verify the results, and click the intended member.
- Open or reuse your direct conversation and confirm the recipient again before sending.
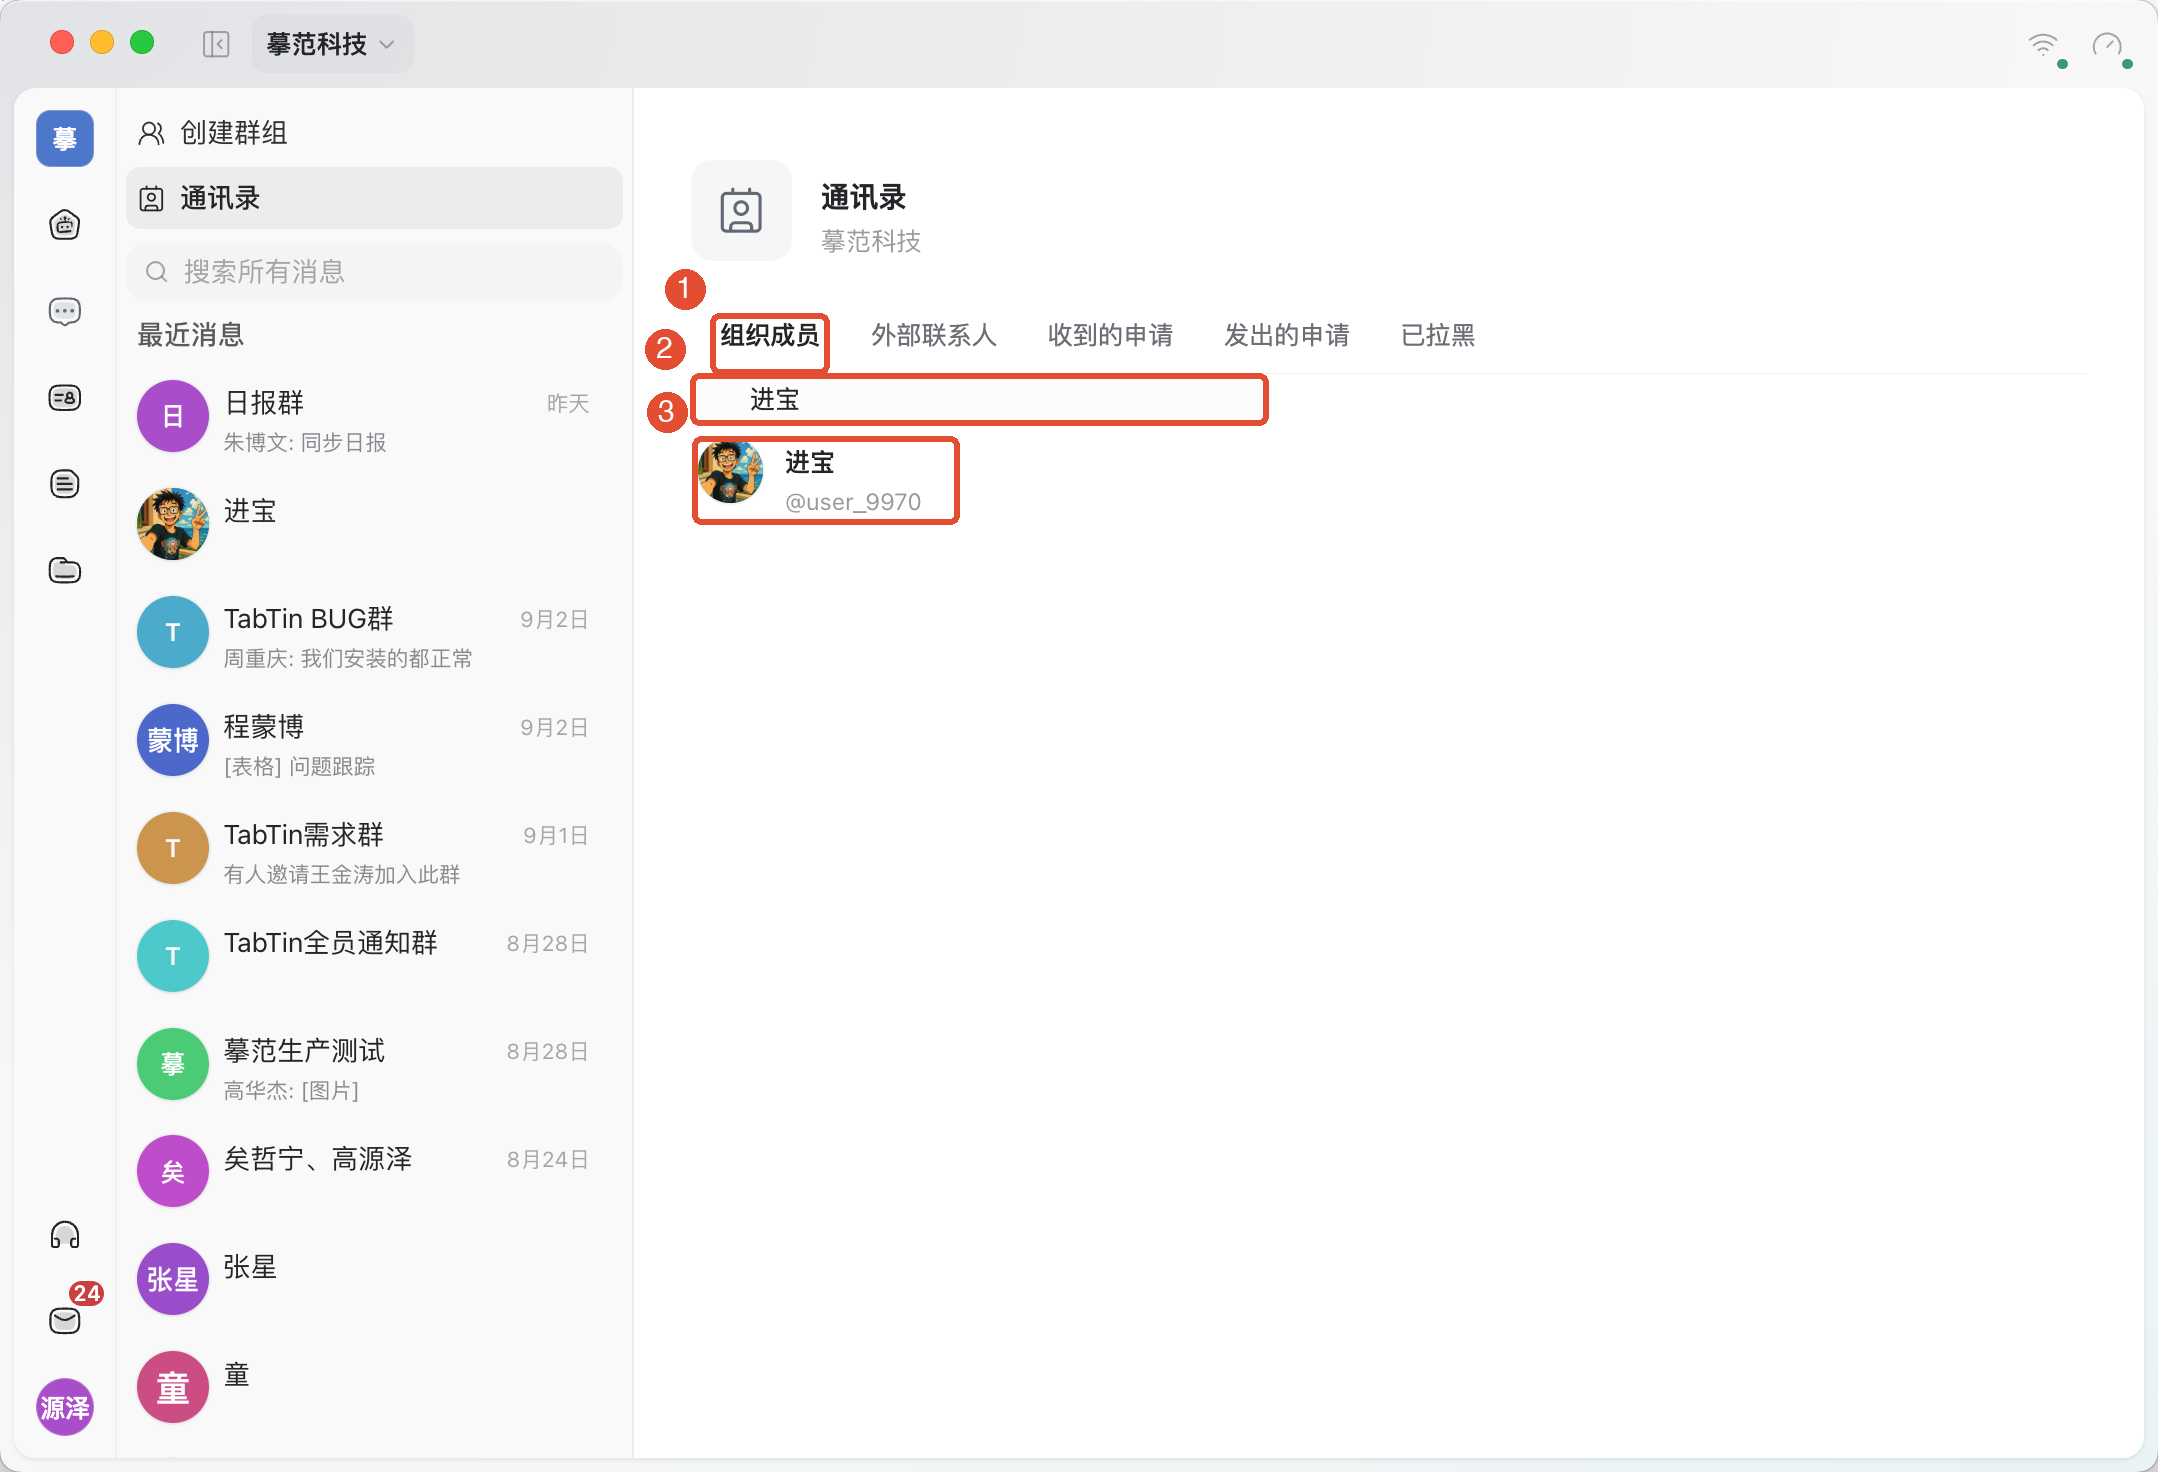
If you cannot find someone, check the organization and keywords, then clear the filter and inspect the list. Your own member card cannot start a direct conversation with yourself.
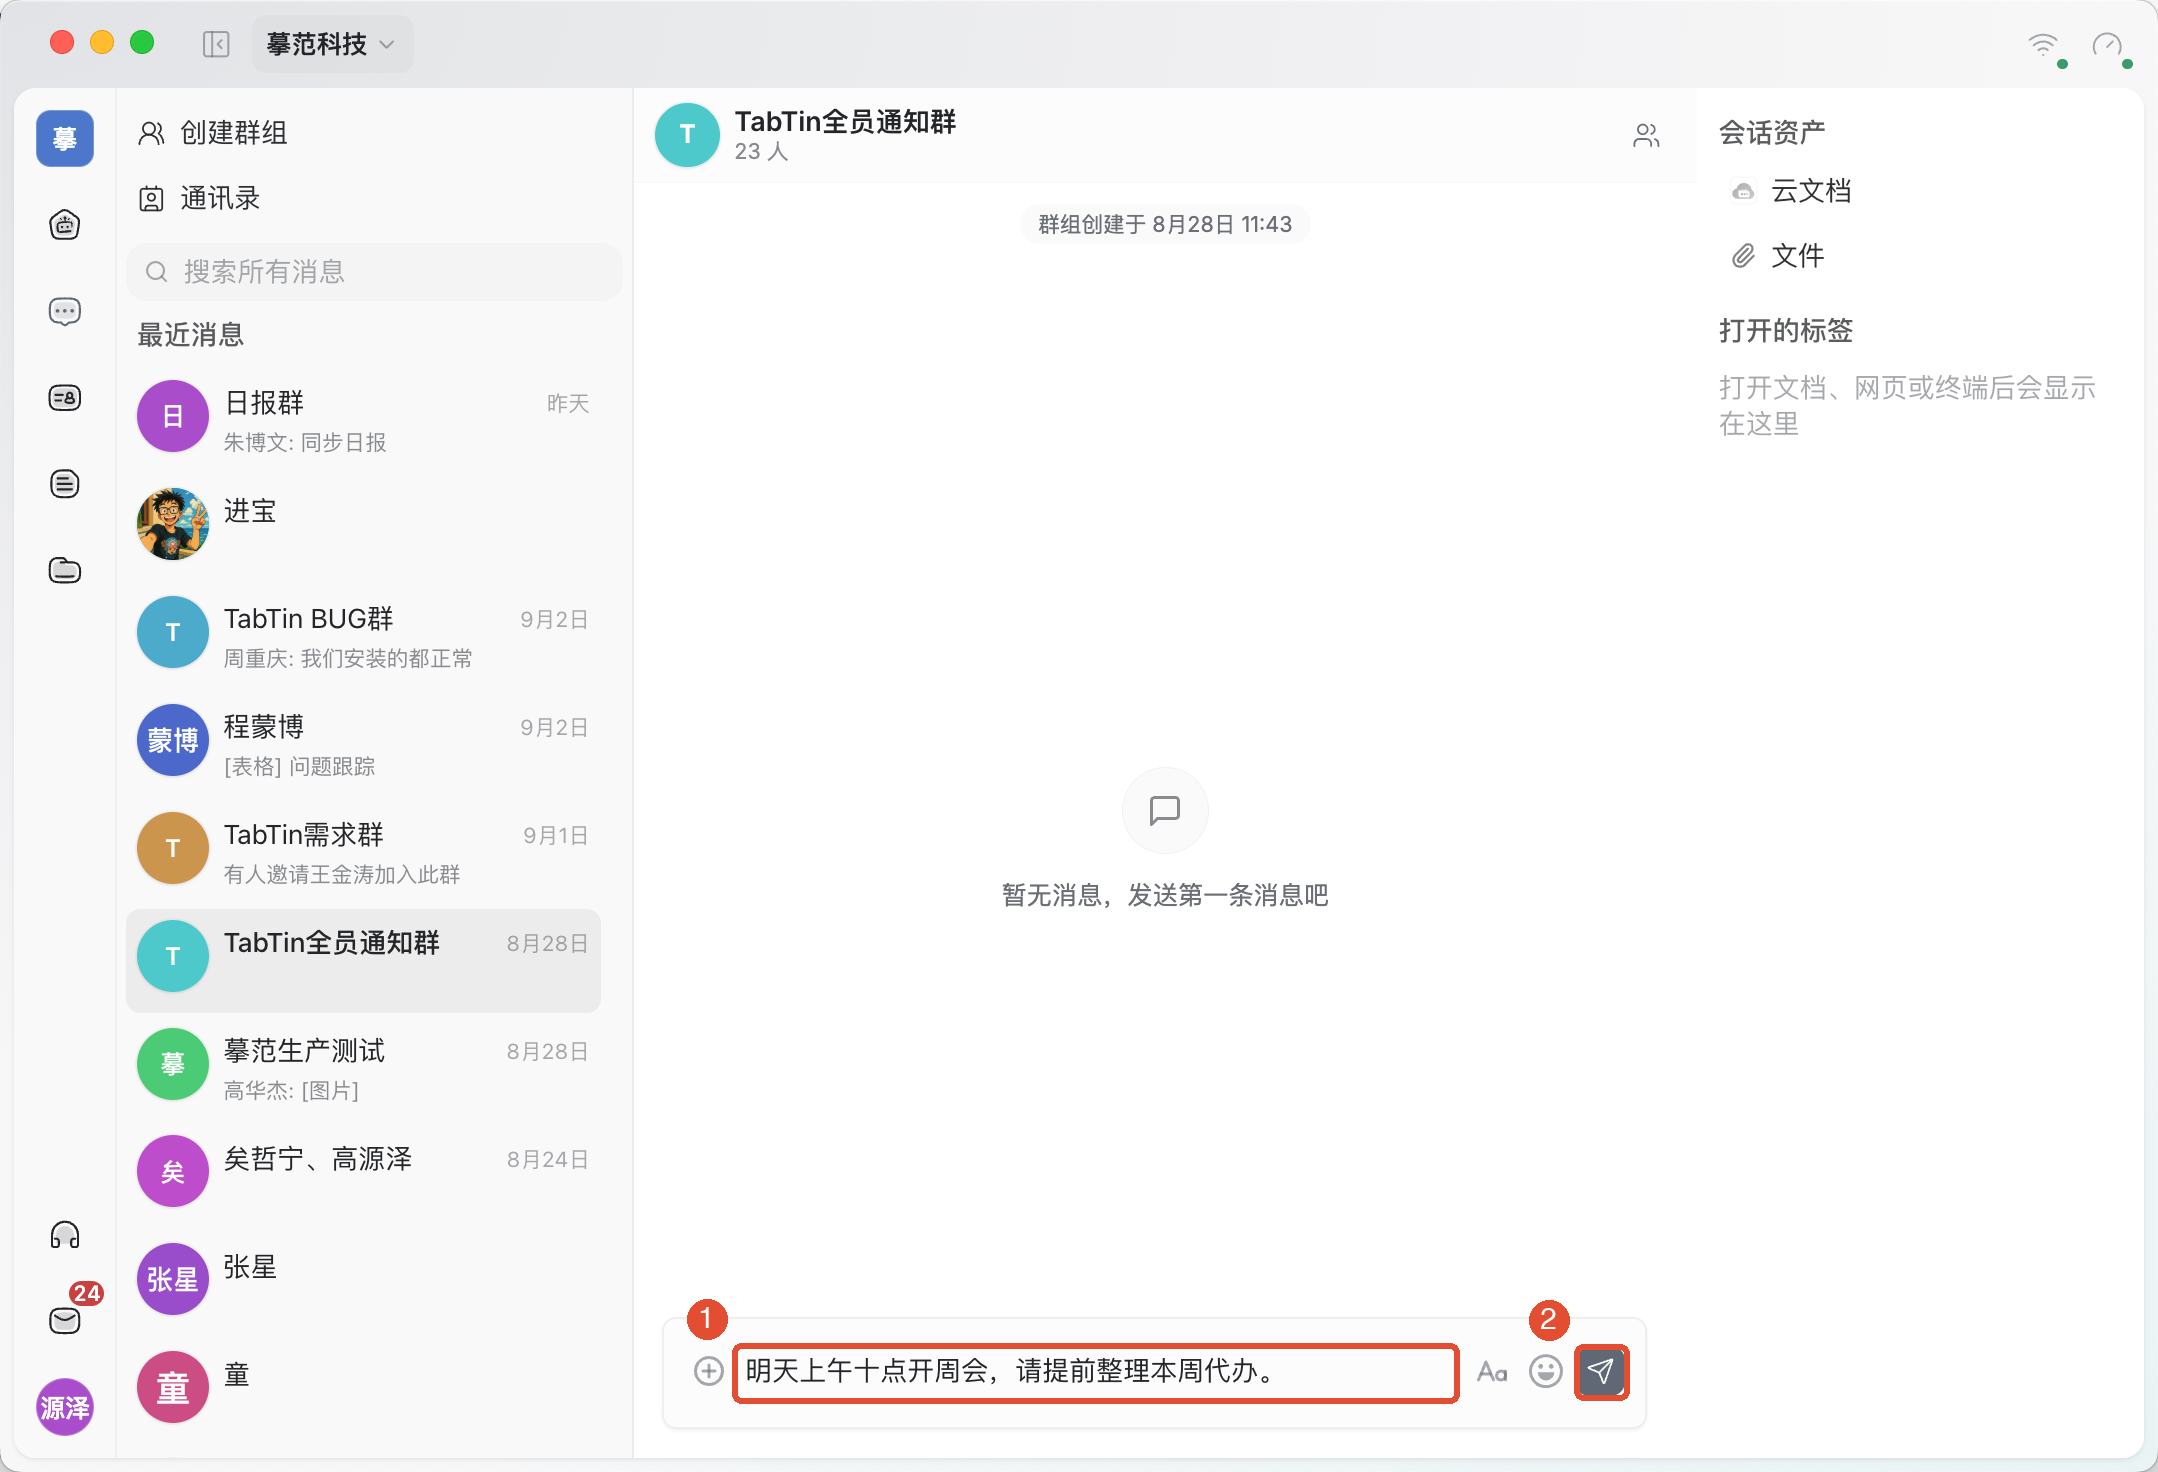
3. Enter and send a message
- Open the intended direct conversation or group and type in the bottom input box.
- Check the recipient, text, and attachments, then click Send. Enter can also send messages; check the shortcut hint when composing longer content.
- Watch the message status. If sending fails, check the connection and retry that message rather than repeatedly sending new copies.
4. Share files or cloud materials
- On the left of the message input box, click +.
- To share material from your computer, choose Local file; for existing cloud materials, choose Cloud file.
- Follow the picker to select materials, check their names and the recipient, and send.
- Have the recipient open the materials to confirm they have permission.
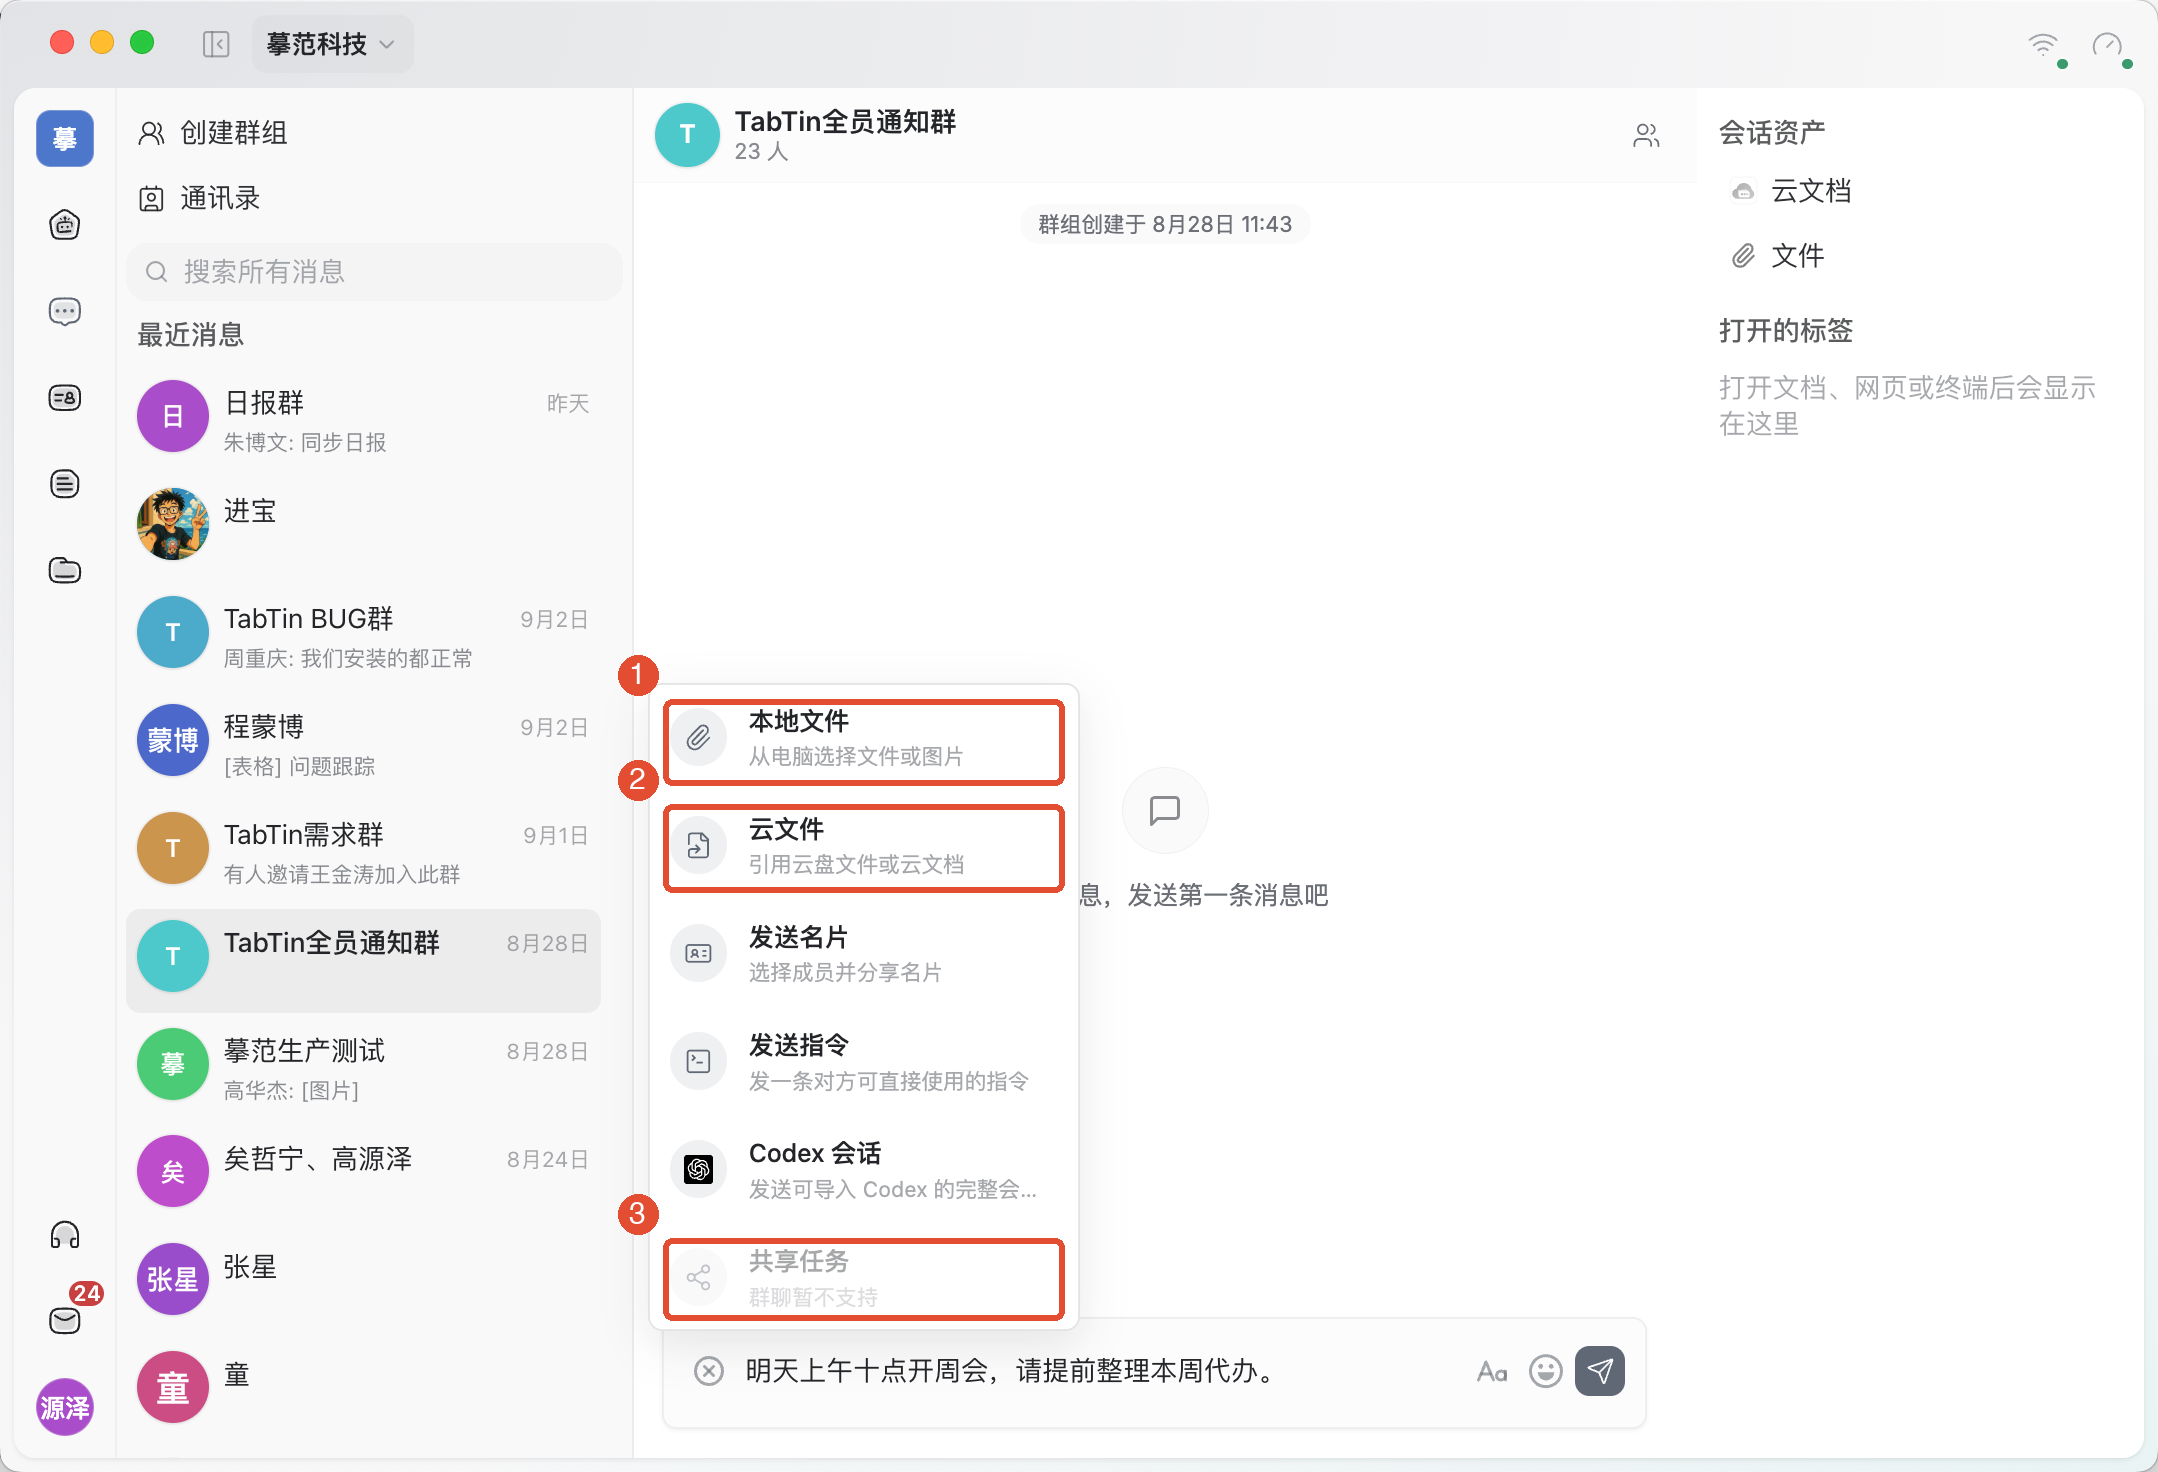
You can also drag local files into the input area. Handle upload or send failures for the specific failed item. Cloud resource cards do not bypass the original file’s access permissions.
5. Create a group discussion
- At the top of the message sidebar, click Create group.
- Enter a recognizable group name, such as “Product team.”
- Search for and select colleagues, then check the members on the right.
- Confirm the group name and members, then click Create group and start communicating in the new group.
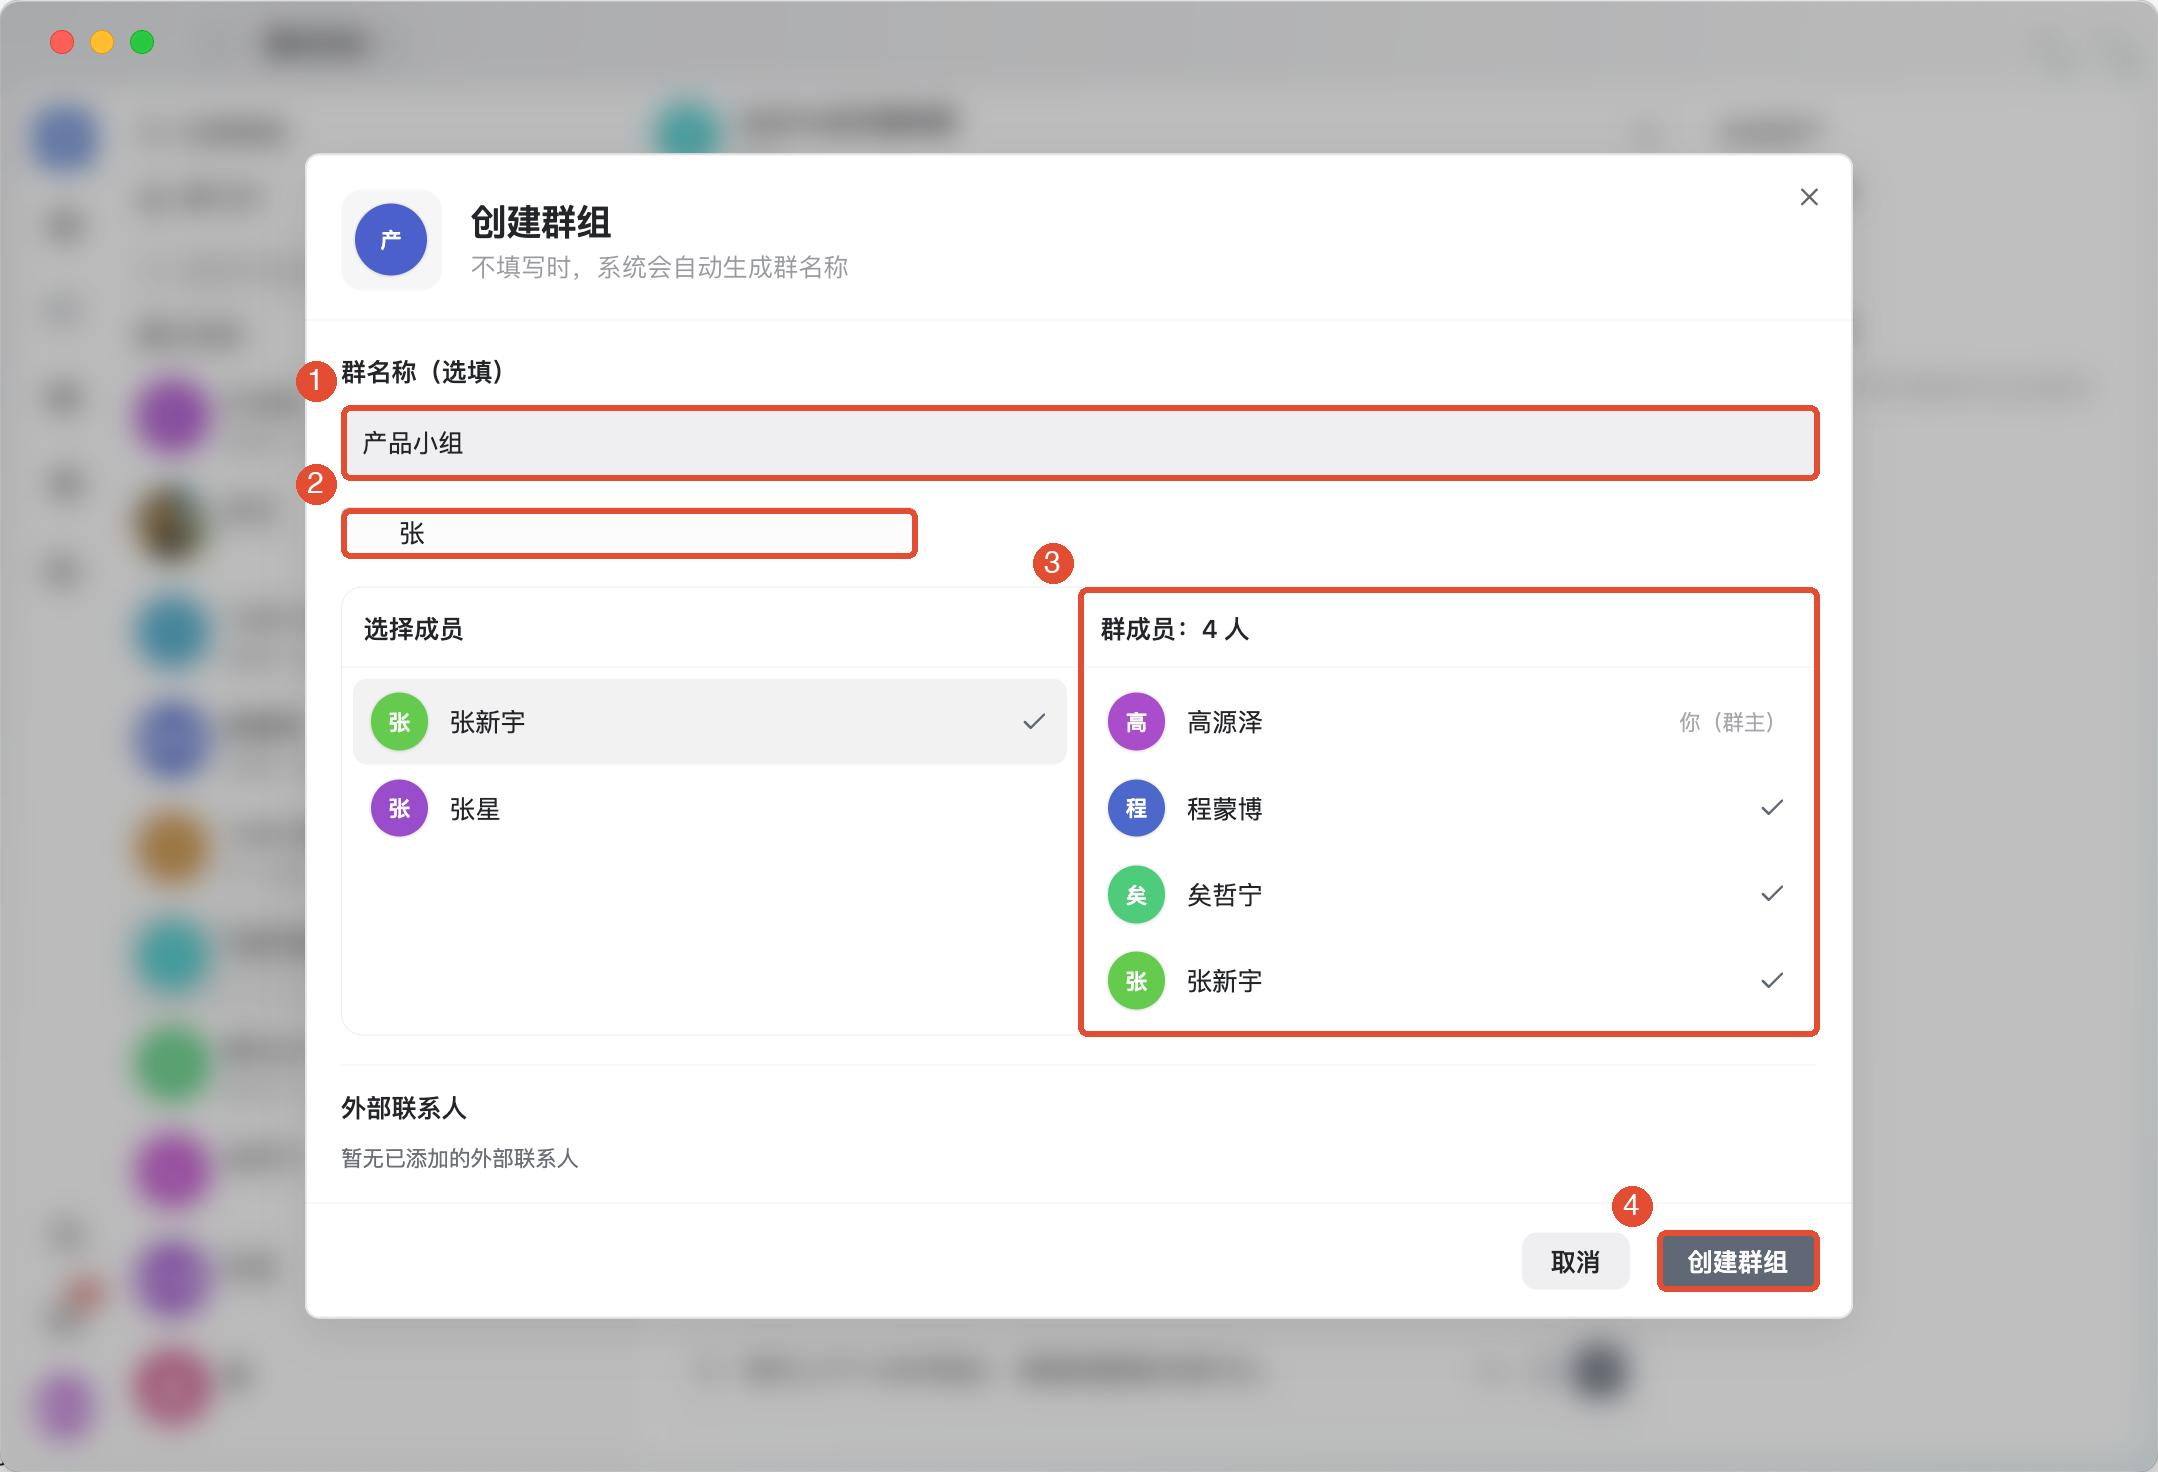
The current form also lets you create a named group without selecting other members and add colleagues later. Managing members and editing group details require the appropriate role permissions.
Other common features
Find earlier messages
In the message sidebar’s Search all messages, enter keywords and select a conversation or message from the results to return to its original context. Memorable terms such as “weekly meeting” or “meeting notes” can help.
Reply and organize conversations
To respond to a specific message, open its action menu and select Reply, then type in the main input area. Reply details let you read related content together; return to the main input area to keep sending.
Right-click a frequently used conversation to access actions such as Pin, Do not disturb, or Mark as read. Do not disturb changes notifications; it does not leave the conversation.
Manage group details and members
Open the group and click its information or members entry at the top. With permission, you can change the name or manage members; check the target before acting. Use Do not disturb to pause notifications without leaving.
Work with AI tasks
Besides sending output files, you can share tasks from the task page to IM contacts or groups. Recipients can open, fork, or continue via handoff as needed—for example, take over a meeting-notes task to add action items. Task and attachment permissions are separate; confirm access to needed materials before sharing.
Coming later: Agent support is planned for IM but is not available yet. Adding Agents or assigning them work in groups is therefore not a current step in this guide.
Things to keep in mind
- Before sending, confirm the direct recipient or group name, as well as attachment names and content.
- Sending a resource card does not grant resource access. If it will not open, check the original resource’s settings.
- If the network disconnects or sending fails, check the status and error. An empty input box alone does not prove receipt.
- Group details and member management depend on role permissions. Read confirmation prompts before clearing history, leaving a group, or similar actions.
FAQ
What if I cannot find a colleague in the directory?
Check the organization and spelling, then clear the filter. If you need a contact, follow the contact workflow provided by the current directory.
Why can the recipient not open a file I sent?
Check that uploading or sending succeeded, then inspect the original cloud resource’s permissions. Chat access does not imply file access.
Why is the shared-task button disabled in group chat?
The screenshot’s restriction applies to “Share task” in the group input box’s plus menu. To share with contacts or groups, use the sharing action on the task page and check recipients and access permissions.