Workbench · 7 min read · Updated 2026-09-08
How do I find, organize, and share cloud drive materials?
Cloud drive centrally stores the current organization’s documents, tables, and files.
Feature overview
Cloud drive centrally stores the current organization’s documents, tables, and files. Upload computer files to the cloud, organize them in folders, then find, preview, download, or share them with the people who need them.
This guide uses fictional reimbursement descriptions, expense details, and itineraries under “Business trip reimbursement materials” to explain uploading through sharing.
How to use it
First open the workbench
Open TabTin and go to the left-side Task page and click New task. In “Shortcuts” at the bottom right of New task, click Workbench to open the application entry list.
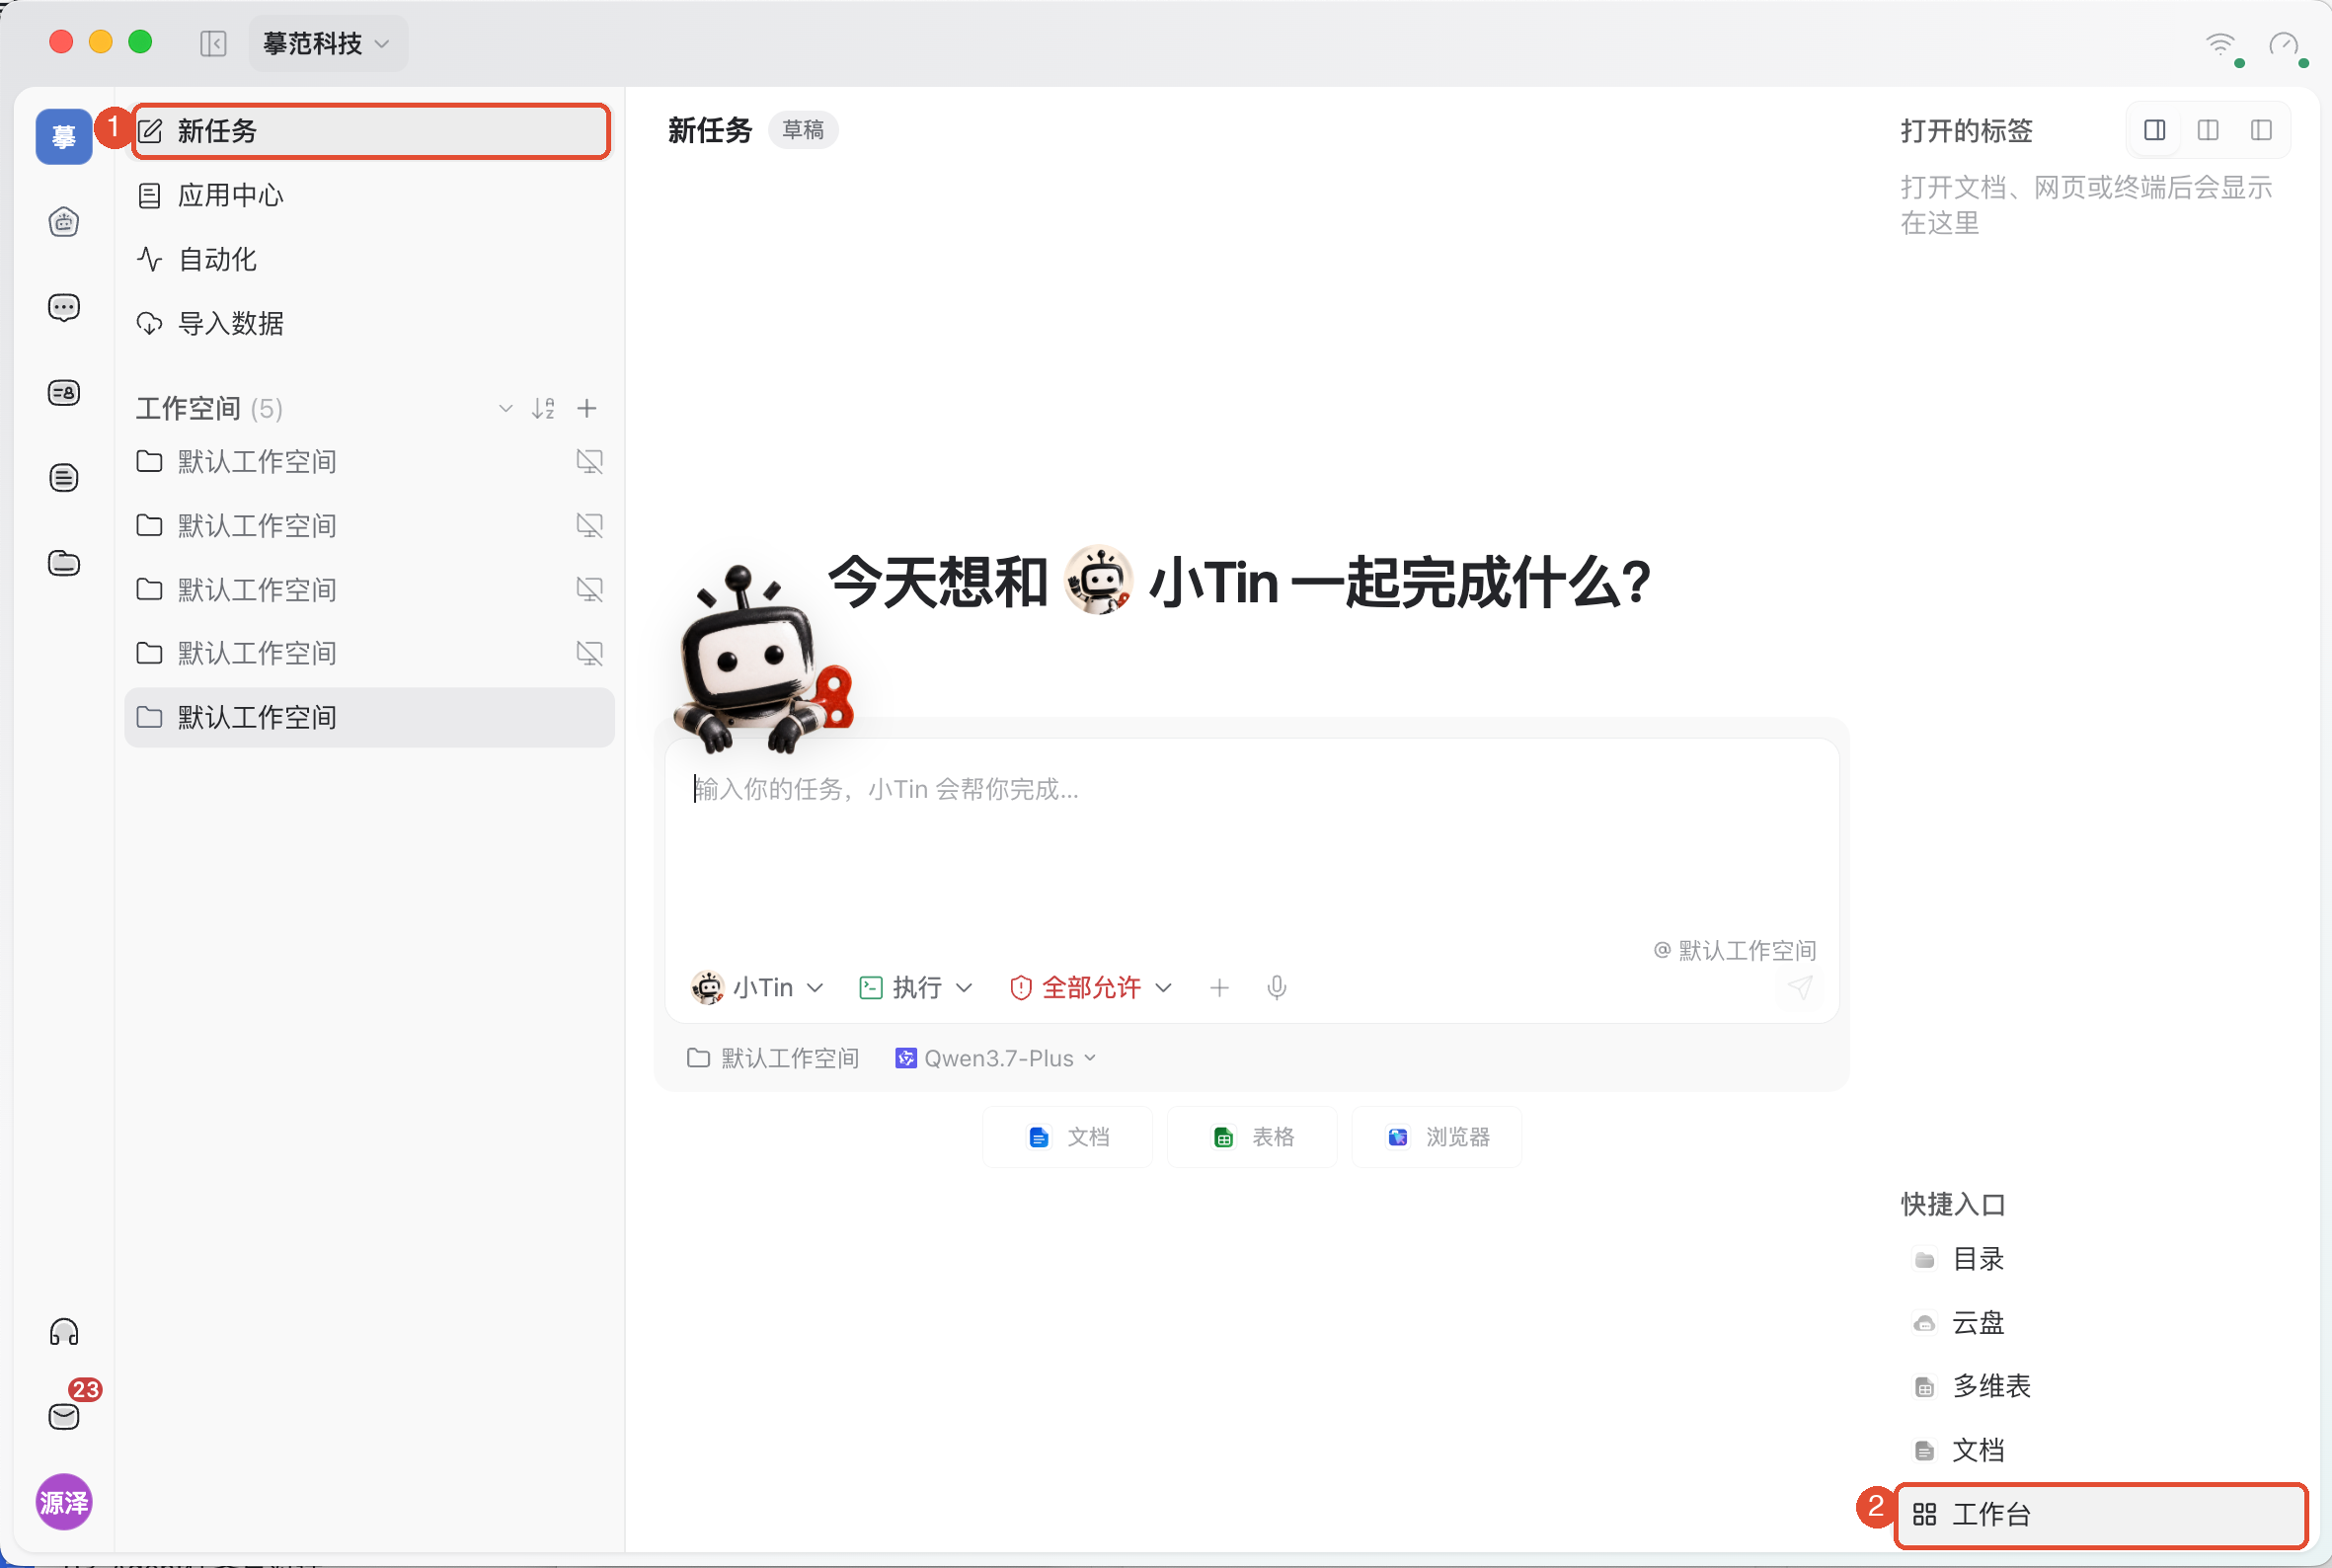
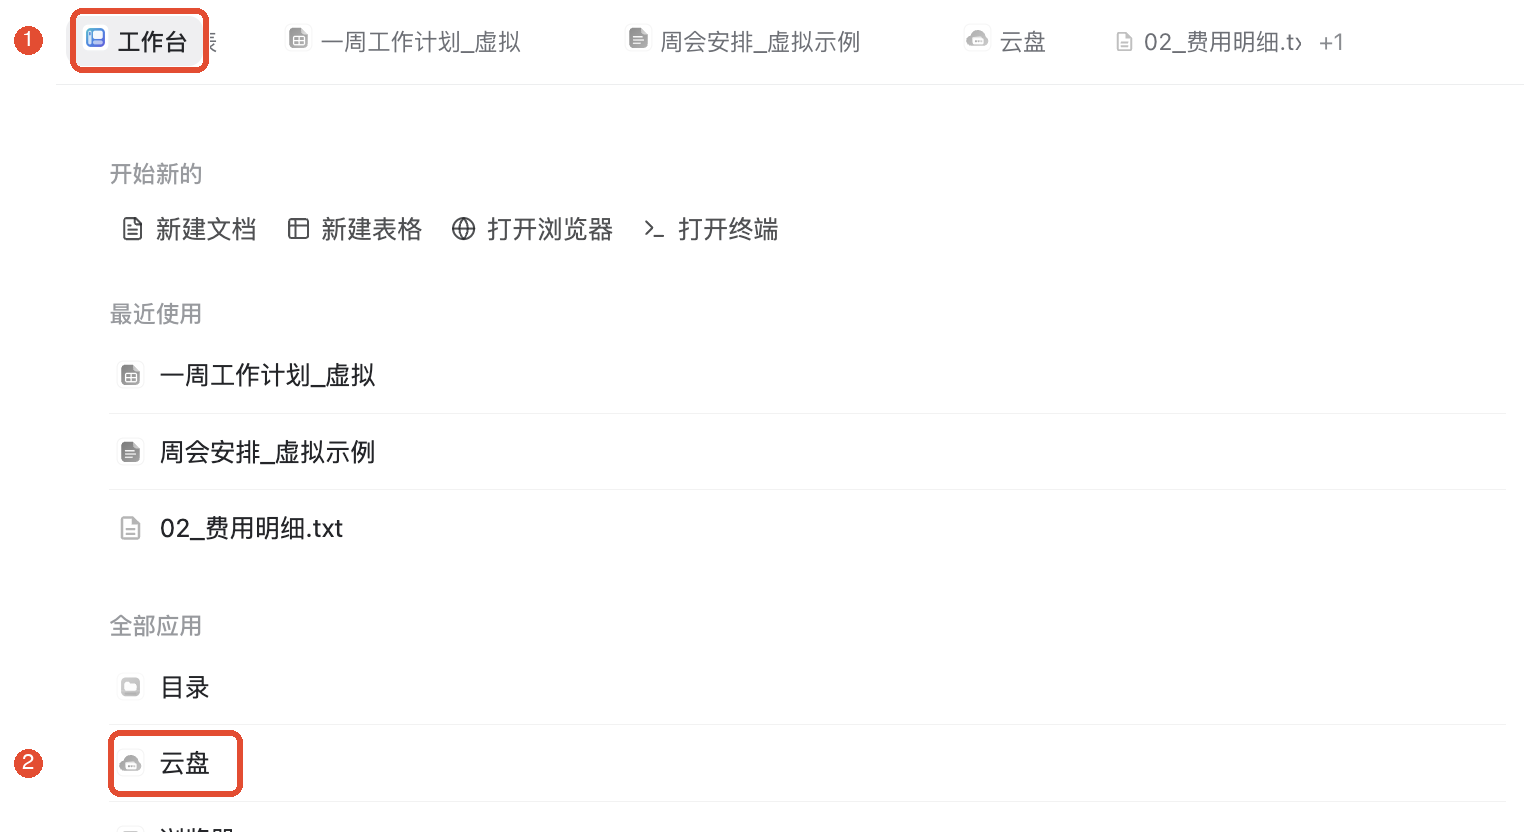
Once there, open the application using the steps below. If the top Workbench tab is already visible, click it to return to the application list.
1. Open Cloud drive
- Open the task’s Workbench and, under All apps, click Cloud drive.
- Confirm the current organization before reviewing materials.
- Choose as needed: All, Tables, Documents, Files, or open a folder to go one level deeper.
Cloud drive shows resources you may access in the current organization, not an automatic copy of a computer folder. Switching organizations may change visible materials and permissions.
2. Create a folder and upload materials
To archive reimbursement materials, first click New → New folder, enter “Business trip reimbursement materials_fictional,” and confirm. Open it before uploading so files are easy to find later.
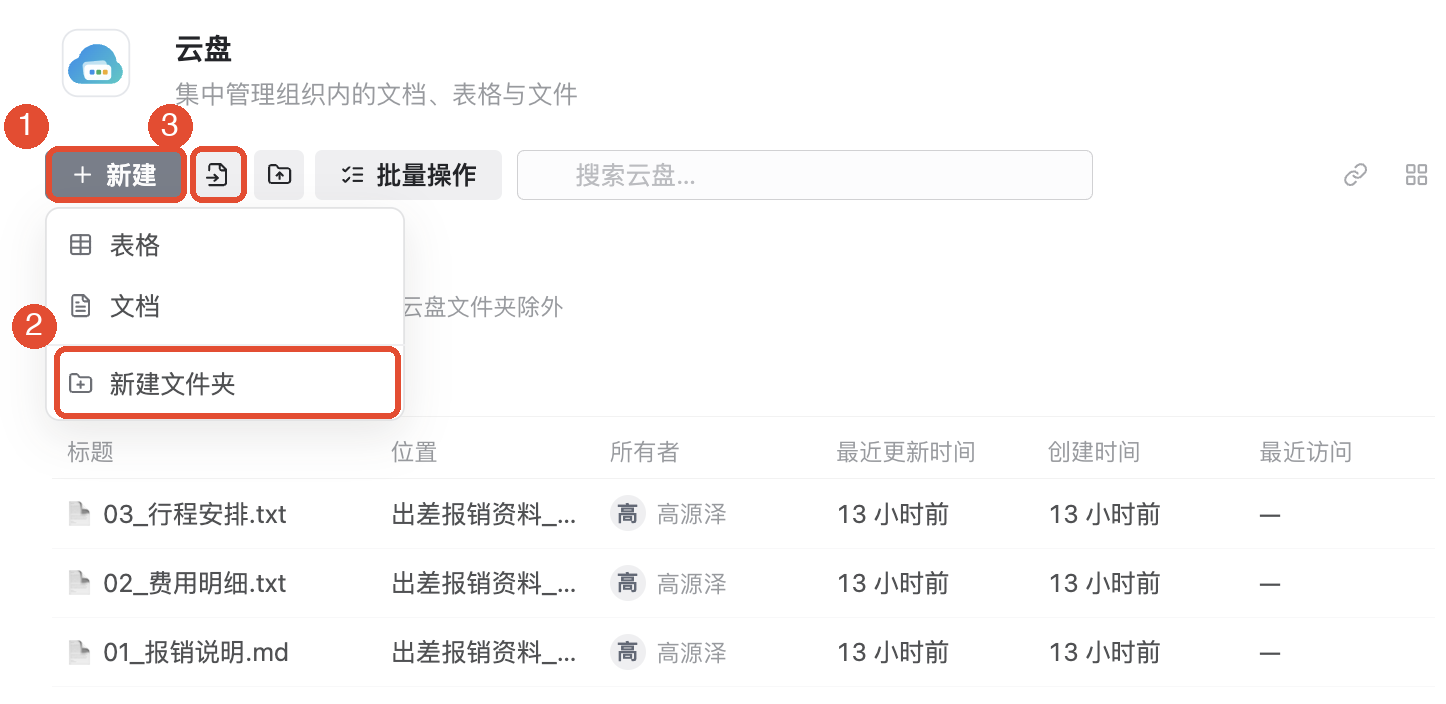
- In the target folder, click Import.
- In the system file picker, select the reimbursement description, expense details, or itinerary on your computer.
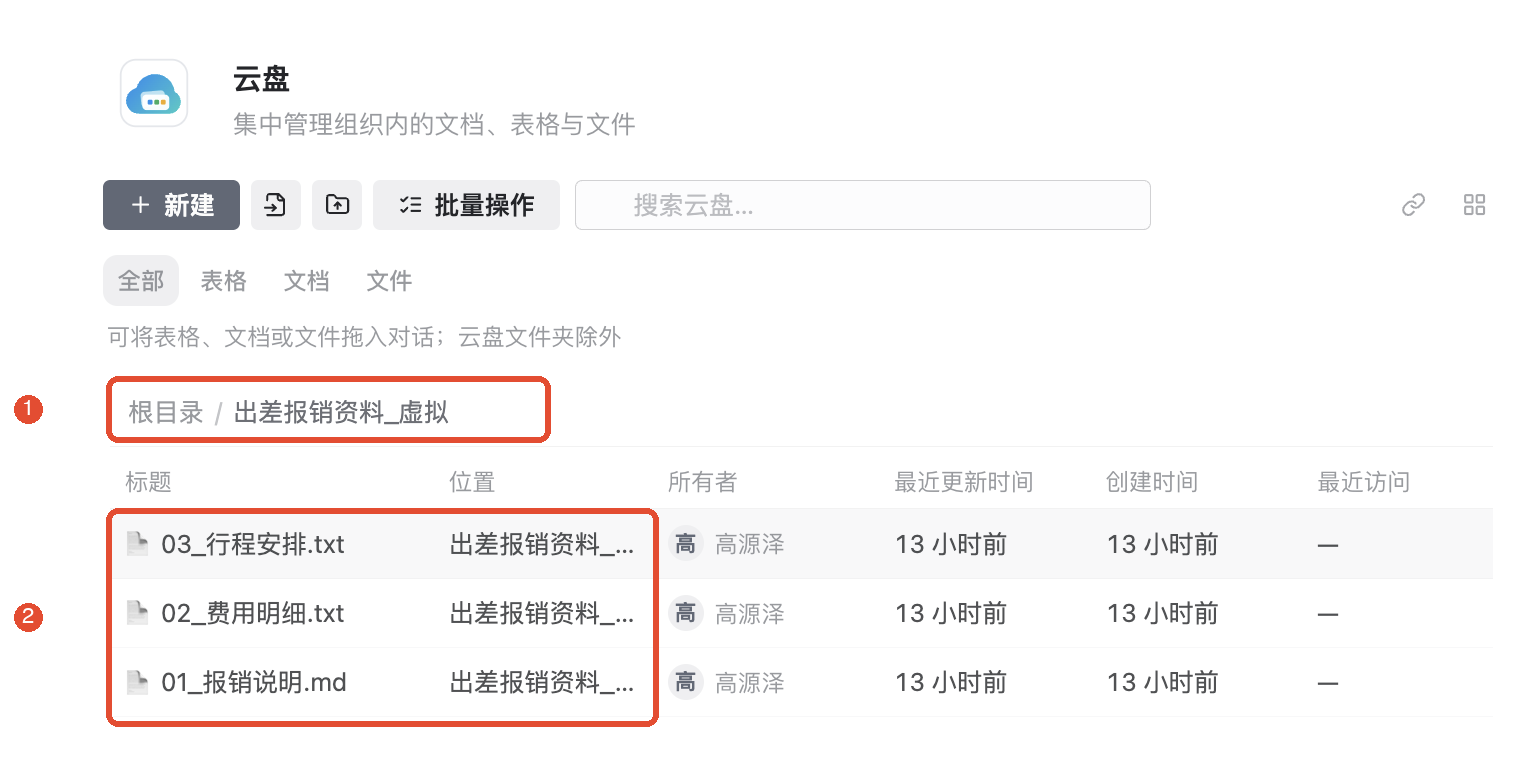
- Wait for uploading to finish, then check filenames and locations in the list.
- Open each preview to verify the correct content was uploaded.
If a folder is already organized on your computer, you can click Upload folder and select it. Cloud drive creates a same-named folder and processes its directly contained files.
Folder uploads do not recursively process deeper subfolders.They also skip empty, oversized, duplicate-named, and unsupported files. Compare the results with the source folder afterward. A cloud folder’s appearance does not mean all materials uploaded.
3. Find and preview files
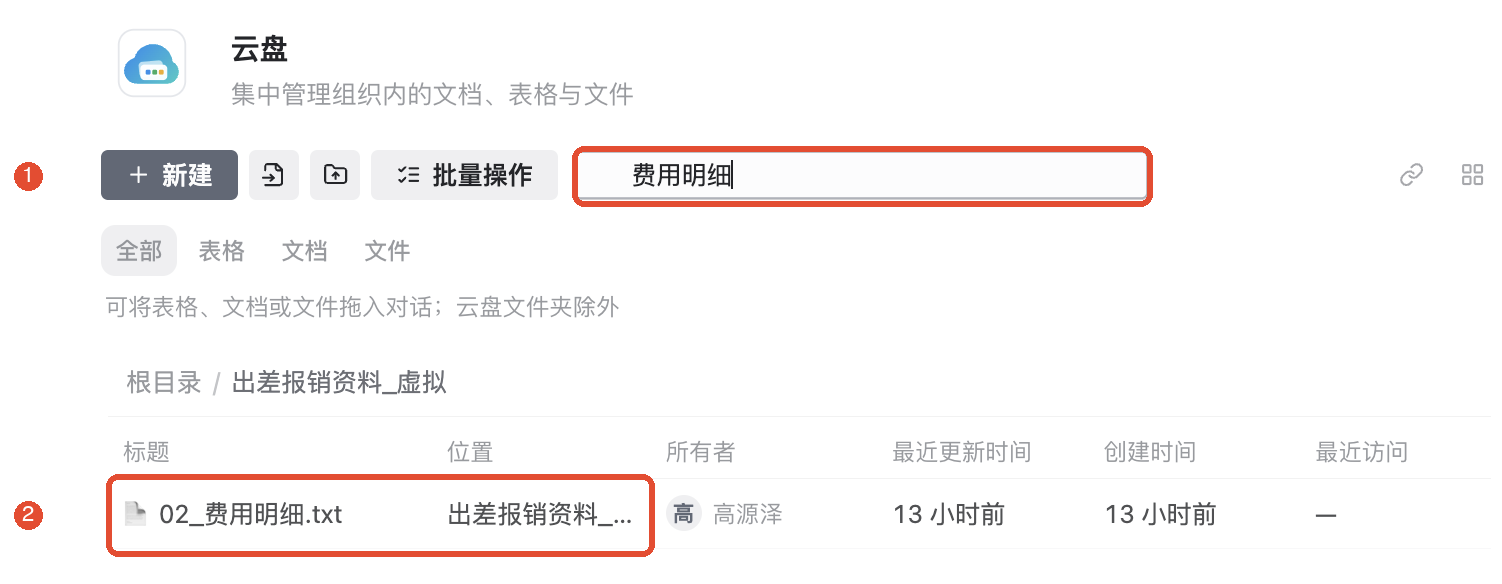
- Enter part of a filename, such as “expense details,” in the search box.
- Narrow by type if needed; choose Files for ordinary uploads.
- Check result names and the Location column, then open the file.
Search mainly matches resource titles and folder names, not ordinary file contents. Type filters may show results from different organization folders, so also verify location.
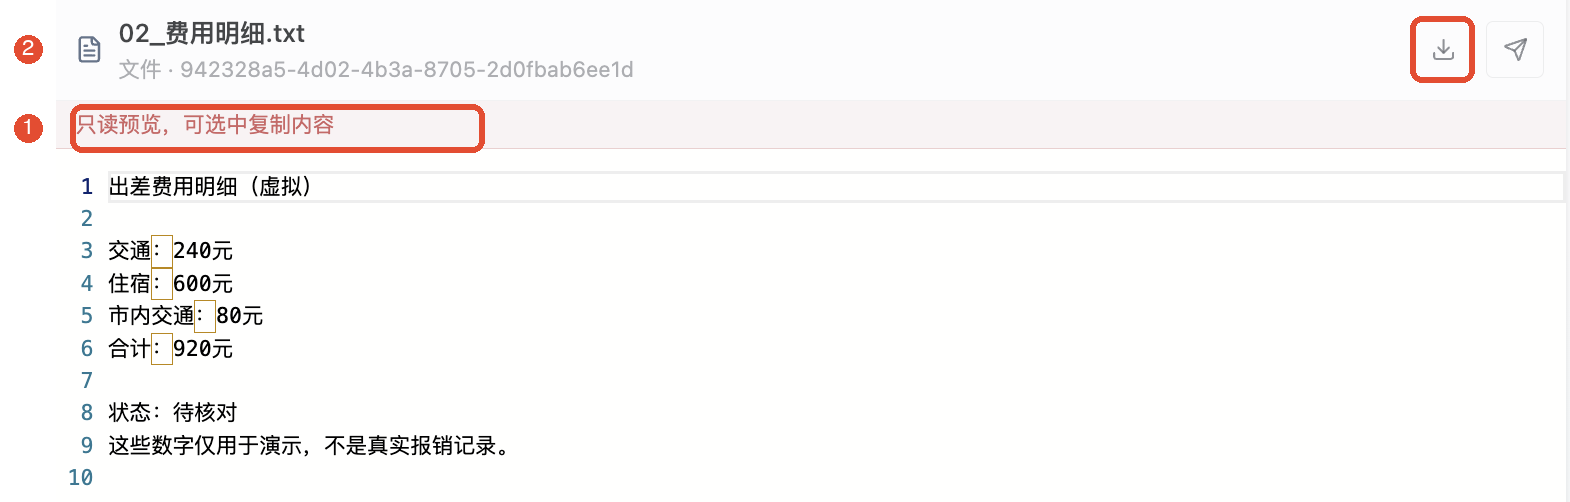
Ordinary cloud files have read-only previews. TXT shows text, Markdown shows formatted content, and other formats depend on preview support. If unavailable, download and open in an appropriate application.
4. Organize names and locations
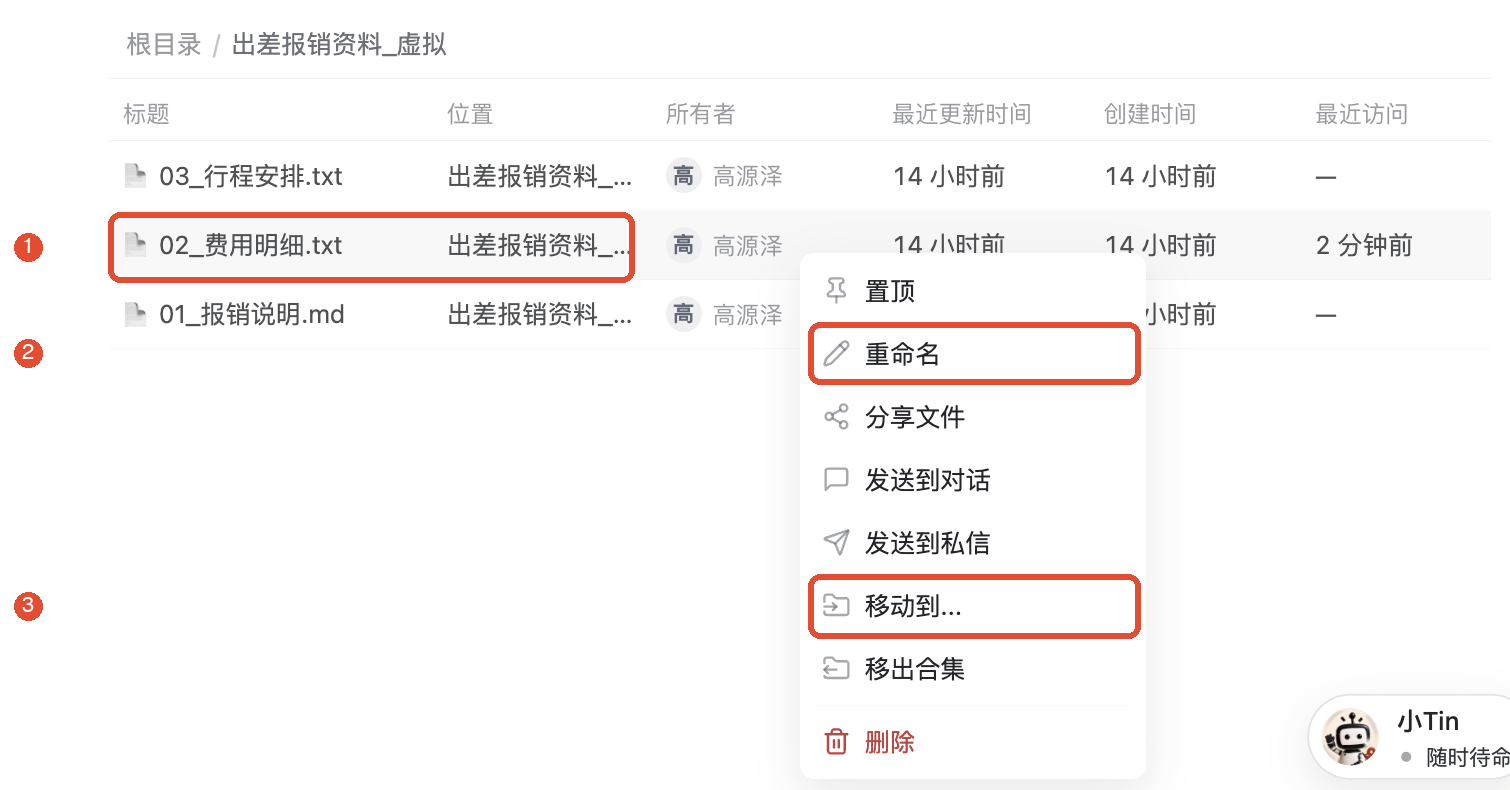
Rename: Right-click a file and choose Rename, enter a recognizable name, and save. For example, change “details.txt” to “trip-expense-details.txt.”
Move: Right-click and choose Move to, select a destination folder, and confirm. Check Location or open the destination afterward to verify filing.
Batch organization: Select multiple resources, check the Selected count, and use Move or other actions. Recheck selection scope after changing folders or filters.
“Collection” in the menu means a cloud drive folder used to organize resources. Remove from collection differs from Delete; check the target. Switch List/Grid at the top right: lists help compare names, locations, and times, while grids show cards.
5. Share with people who need the materials
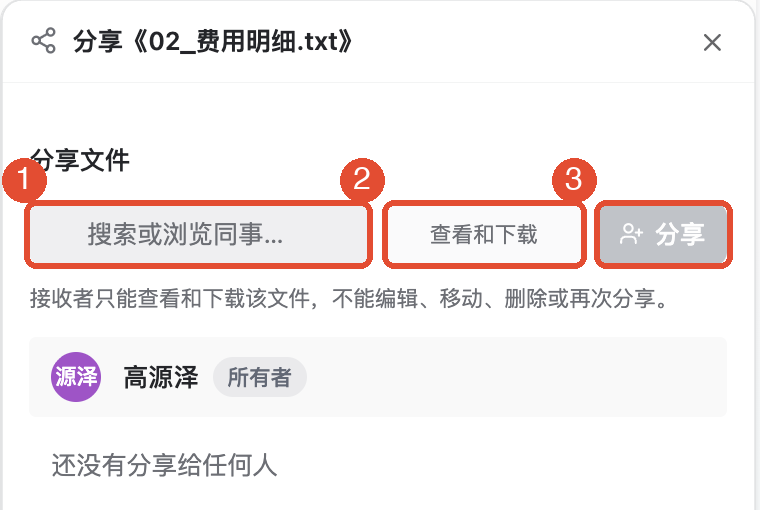
- Find the target file, right-click, and choose Share file.
- Under Search or browse colleagues to select recipients. Ordinary file permissions are View and download; editing access cannot be set here.
- Confirm and complete sharing, then have the recipient look under Shared with me to find it.
Ordinary file sharing primarily grants View and download. Recipients cannot use that permission to edit, move, delete, or reshare files. Set document and table collaboration permissions within those resources.
To bring materials into a discussion, use the resource menu’s Send to conversation or Send to direct message after verifying the conversation and recipient. Folders cannot be conversation attachments directly; select individual files inside.
Other common features
Create a cloud document or table
Click New to create a document, table, or folder. For online editing and collaboration, choose the appropriate document or table feature.
Uploading Word, Markdown, or CSV through Cloud drive Import creates an ordinary cloud file, not an editable TabTin document or multidimensional table. To convert data, use the corresponding application’s import workflow.
Download to your computer
Open the file preview and click Download. Watch for completion, then use Open file location to locate the result. The client may save directly to the default download folder without showing a location picker.
Open the downloaded file and verify its contents. Download URLs may expire; return to Cloud drive and download again. Do not treat a temporary download URL as a permanent sharing link.
Pinning, subfolders, and deletion
For frequently used resources, use the context menu’s Pin. Create folders inside folders for sublevels; use the path navigation at the top to return upward.
Deleted ordinary cloud files enter the organization recycle bin. Check names and scope first, including nested folders and resources when deleting a folder. To restore an ordinary file, give AI its name and ask it to search the recycle bin and restore that file, then verify it in Cloud drive. Permanent deletion is irreversible and differs from ordinary deletion.
Ask AI to organize materials
Specify the organization, folder, filenames, and allowed actions. For example: “Review the reimbursement description, expense details, and itinerary in the trip reimbursement folder. List each file’s purpose and any missing materials.”
For moving, renaming, or sharing, also specify destination, naming rules, or recipients. Verify results in Cloud drive afterward and handle partial failures individually.
Things to keep in mind
- Ordinary uploads have a 100MB limit; empty files cannot upload normally. Folder uploads also depend on supported formats and cover only directly contained files.
- Ordinary file previews are read-only. To edit, download and modify, or use the corresponding document/table import and editing features.
- Resources shared by others are not your own; you may lack rename, move, or delete permissions.
- Cloud drive folders and the cloud document knowledge tree are separate structures. Moving a cloud drive file does not change its knowledge-tree position.
FAQ
Why is an uploaded file still missing from the list?
Wait and reenter the folder, then check organization, path, and filters. Retry after confirming persistent failure, rather than immediately uploading duplicates.
Why are files missing after a folder upload?
Check whether they are in deeper subfolders, empty, oversized, duplicate-named, or unsupported. Compare actual file lists item by item.
Why does searching a word from the body not find the file?
Cloud drive mainly searches names. Use filename keywords, or browse by type and folder.
Why can I view but not modify a file?
Ordinary files use read-only previews, and sharing may allow only viewing and downloading. Use the appropriate editing workflow and confirm permissions.
What if a download link will not open?
It may have expired, access may have been revoked, or the resource deleted. Reopen the file in Cloud drive; if it still fails, check resource status and permissions.